How to create a repeating pattern in Adobe Illustrator.


  • Advice & Tutorials
  • Final pattern example. Repeating pattern tutorial.

    In this repeating pattern tutorial, I’ll show you how to create a pattern that seamlessly repeats in a grid fashion. This guide is suitable for people who already have a basic understanding of how Adobe Illustrator works and how to create artwork.

    It’s quite straightforward to make an illustrated pattern or group of motifs that you’re really pleased with, but it can become very complicated when you need that pattern to repeat in all directions, particularly when you have overlapping elements or an atypical repeat.

    The benefit of creating repeating patterns in Illustrator rather than Photoshop is that your artwork can be scalable and you have more control over your design.

    Let’s get into this repeating pattern tutorial!

    • Step 1: Set up an artboard

      You don’t need to worry too much about the dimensions being perfect now, and you don’t want to be constrained by them either. I usually start every pattern with a landscape A4 artboard. It’s best to set your colour mode to RGB and dpi to 300. You can always convert these to be smaller at a later date if necessary, but it’s not as easy the other way around.

    • Step 2: Create your artwork

      Let your creativity fly and illustrate the individual parts of your pattern. I like busy and full patterns, so for me this usually includes a few focal motifs (the snakes), some other decorative features (the larger leaves) and then some filler graphics for those awkward little spaces (small leaves). It would be beneficial to group each motif individually to make it easier to arrange your pattern later.

      Now is the easiest time to play around with your colour palette and style, though it’s not the end of the world if you need to tweak something later.

    • Step 3: Begin to arrange your pattern

      Focusing on the centre of your pattern tile, work your motifs into a layout that works for you. I like busy patterns with different angles and consistent gaps, as you can see here. Try to avoid the edges while you play around here.

    • Step 4: Adjust your artboard

      Once you have worked out how your pattern is sitting you can think about where you want the edges to be, and bring your artboard in. I generally bring it in close to the outer motifs, but still with enough of a gap for more items to fit. You don’t want to leave yourself with no space to fit your hanging designs. Your artboard can be constantly adjusted as you fill in the edges, however I find it much simpler to keep the repeat perfect if I make this commitment now.

    • Step 5: Start bringing objects into the edges

      As you start to fill in the gaps around the edge, bear in mind that anything that hangs over the edge will also appear on the opposite side, so ensure that you have space, or extend your artboard to accommodate it. Remember that anything overlaying a corner will need to be repeated in both a vertical and horizontal axis.

      Think about how objects close to the left and right edge will look against one another. It’s very easy to think that they will be far apart, but when the repeat comes into action, they’ll actually be right next to each other.

    • Step 5: Start bringing objects into the edges (cont.)

      When you place something along one edge, you need to replicate it across the opposite side. This is where the benefit of nailing down your artboard dimensions comes in. ‘Copy’ your object and then ‘Paste in Place’. Use your artboard tool to view and make a note of your artboard dimensions, exactly. Then, with your copied object selected, go to Object > Transform > Move. You can then move your object horizontally or vertically in the precise amount to ensure it hangs over the edge correctly. A positive number will move your object right or down, and a negative left or upwards.

      If you struggle with using this technique you could use your Smart Guides, ensuring that ‘Snap to Point’ and ‘Snap to Grid’ are enabled. This works just as well, but the onus is on you to ensure that they align exactly.

    • Step 6: Complete your pattern

      Keep arranging your objects until you have filled the artboard and are happy with how everything is looking.

    • Step 7: Create your repeating pattern

      There are a couple of ways to go about testing your tile to ensure that it repeats correctly, as well as assessing whether there’s any further tweaks you’d like to make.

    Masking

    Use a clipping mask to create a clean edge to your tile that you can manually repeat.

    PROS:

    • You have direct control and it’s easy to continue adjusting the pattern.
    • Good for testing before creating the final outcome.
    • You can scale your tile easily.
    • Keeps your pattern in vector form in Illustrator.

    CONS:

    • Excessive masking can make your file very slow to work with.
    • It’s not ideal to transfer masked smart objects to other programs such as Photoshop.
    • You must be precise.
    • Masking

      Select and group together all the elements of your design. This can, but doesn’t have to, include your background colour.

      Draw a rectangle that precisely matches your artboard. Get in close to make sure that there’s no misalignment.

    • Masking

      Make sure that the rectangle is at the forefront of your work. Select both it and your artwork, right click and choose ‘Make Clipping Mask’.

      You now have your tile!

    • Masking

      Test out how your pattern repeats by copying and pasting the tile. Add your background colour behind the artwork if you didn’t include it in your mask.

      Make sure that ‘Snap to Point’ is enabled in your View menu. ‘Copy’ your tile and the ‘Paste in Place’. Either use Object > Transform > Move again or you can manually move your tile. Ensure to hold down Shift while dragging your tile to keep it aligned.

    • Masking

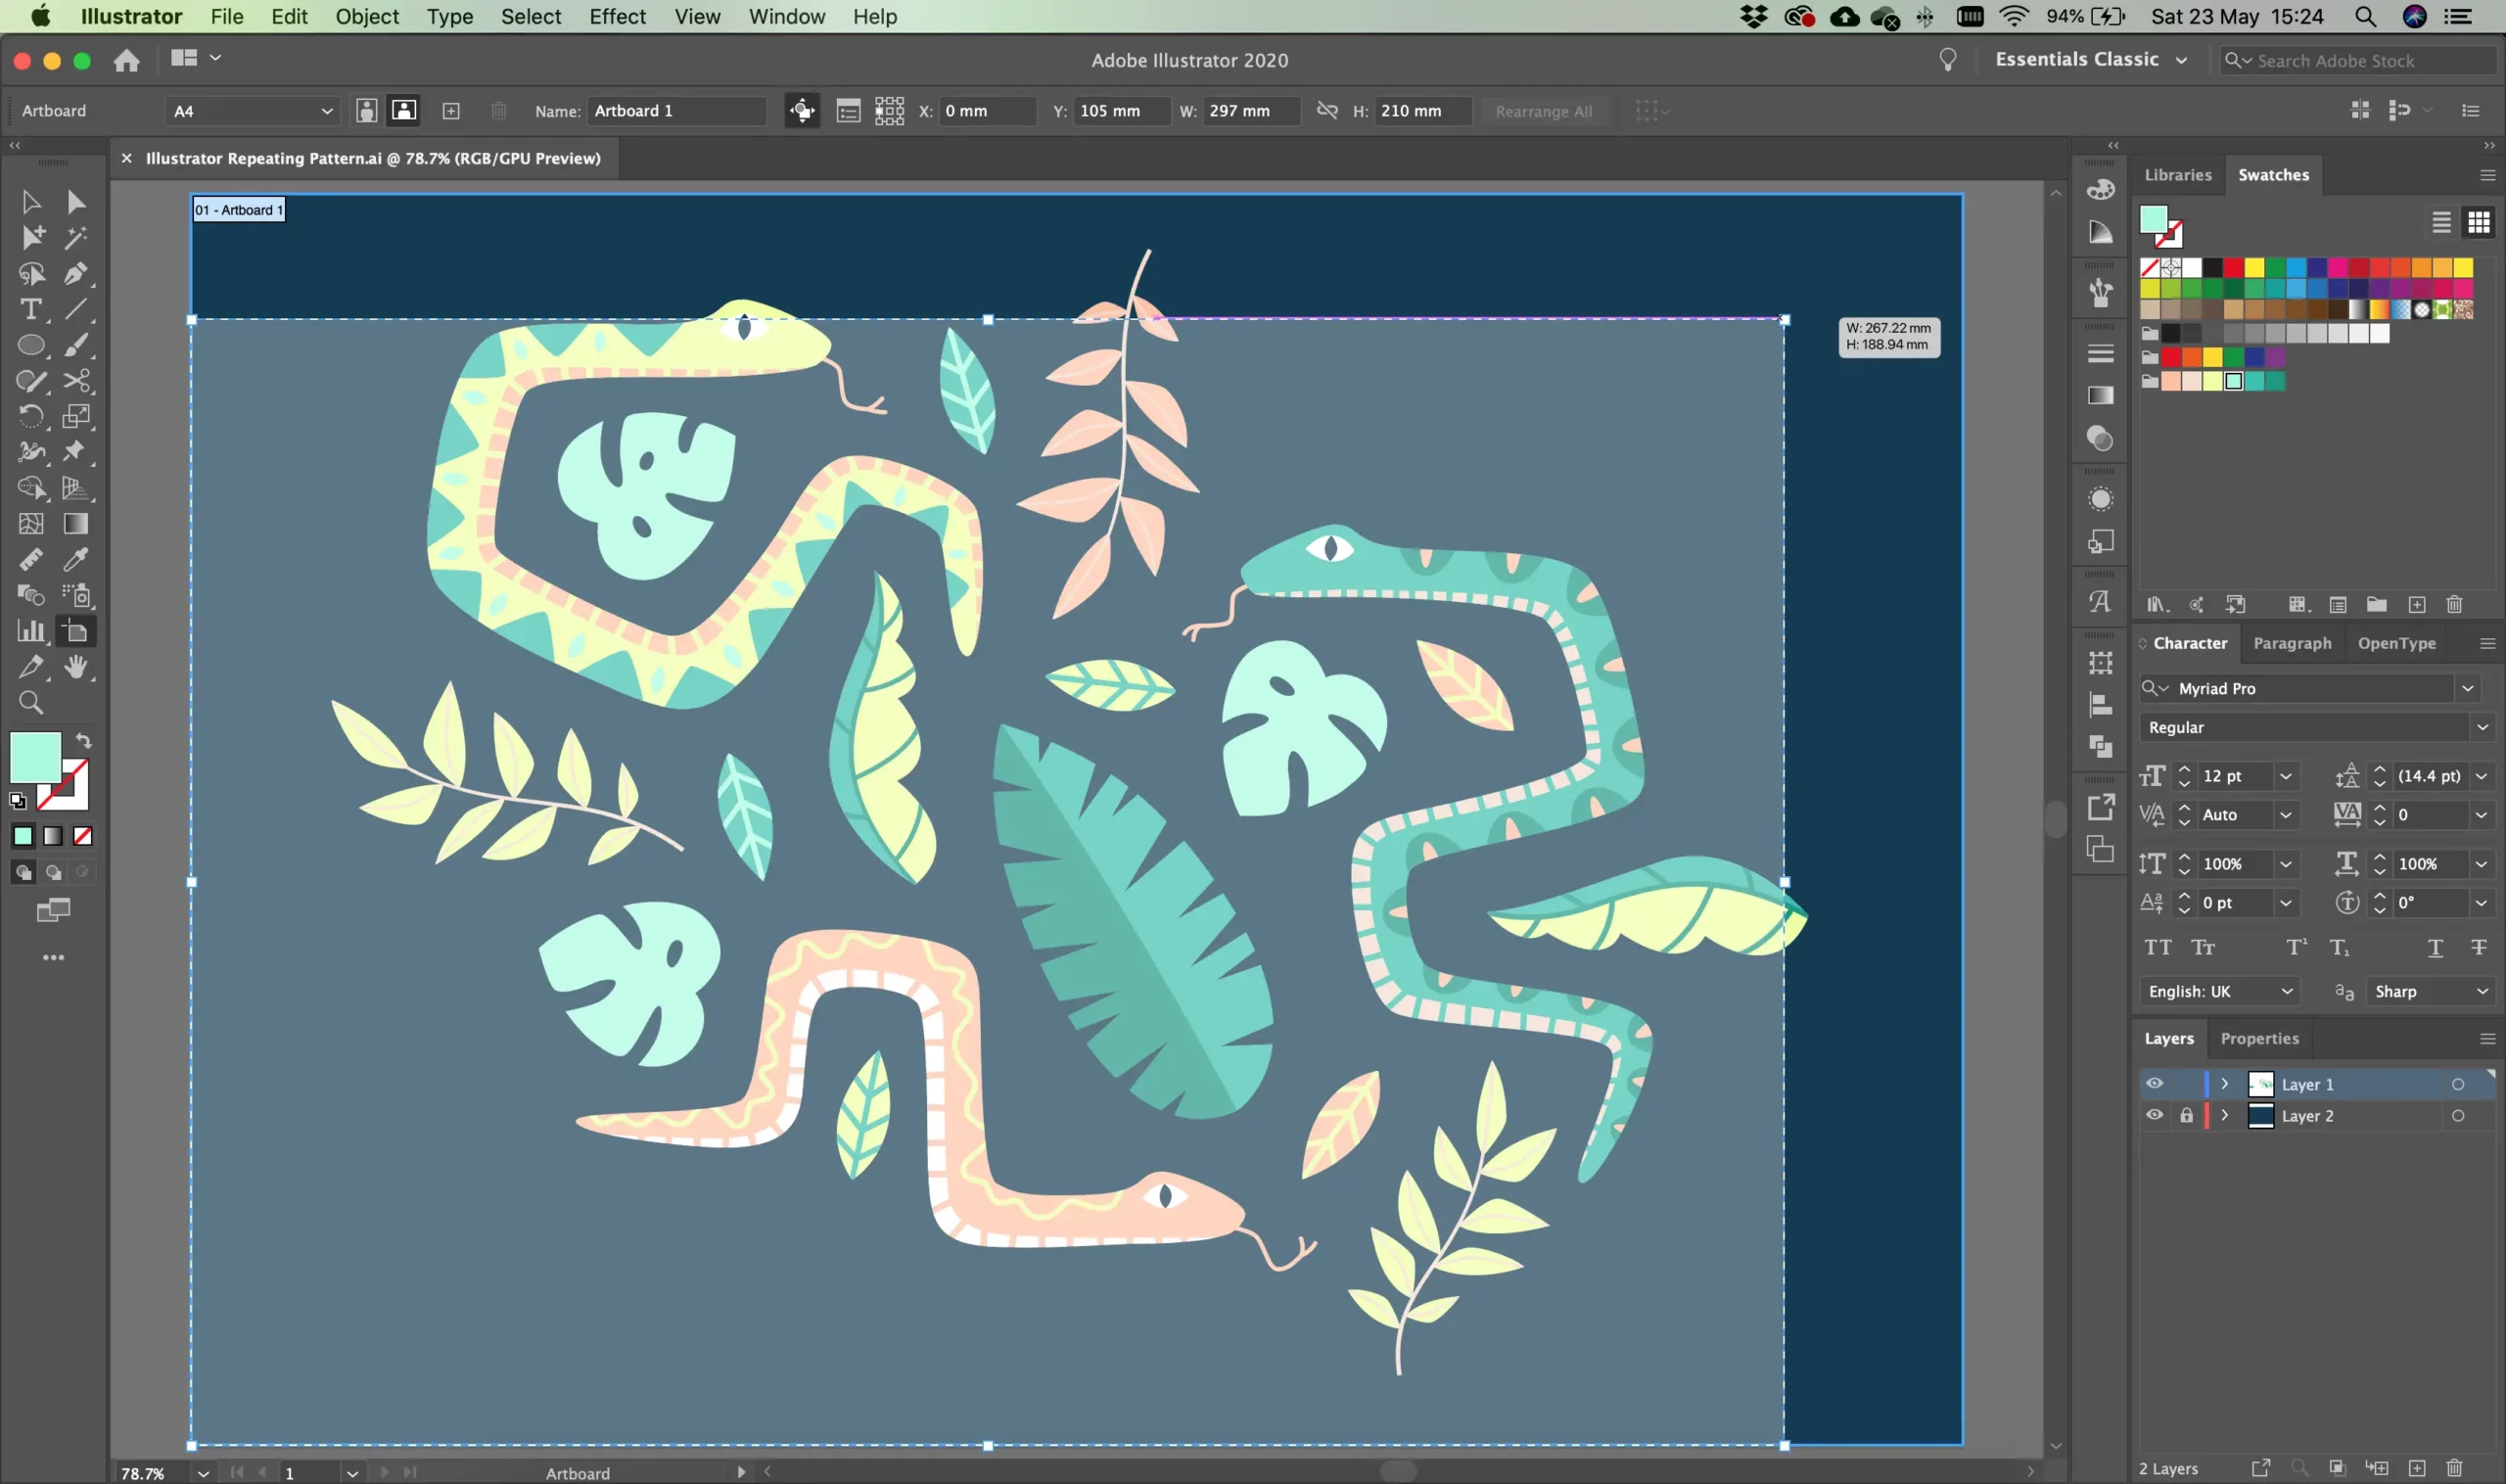
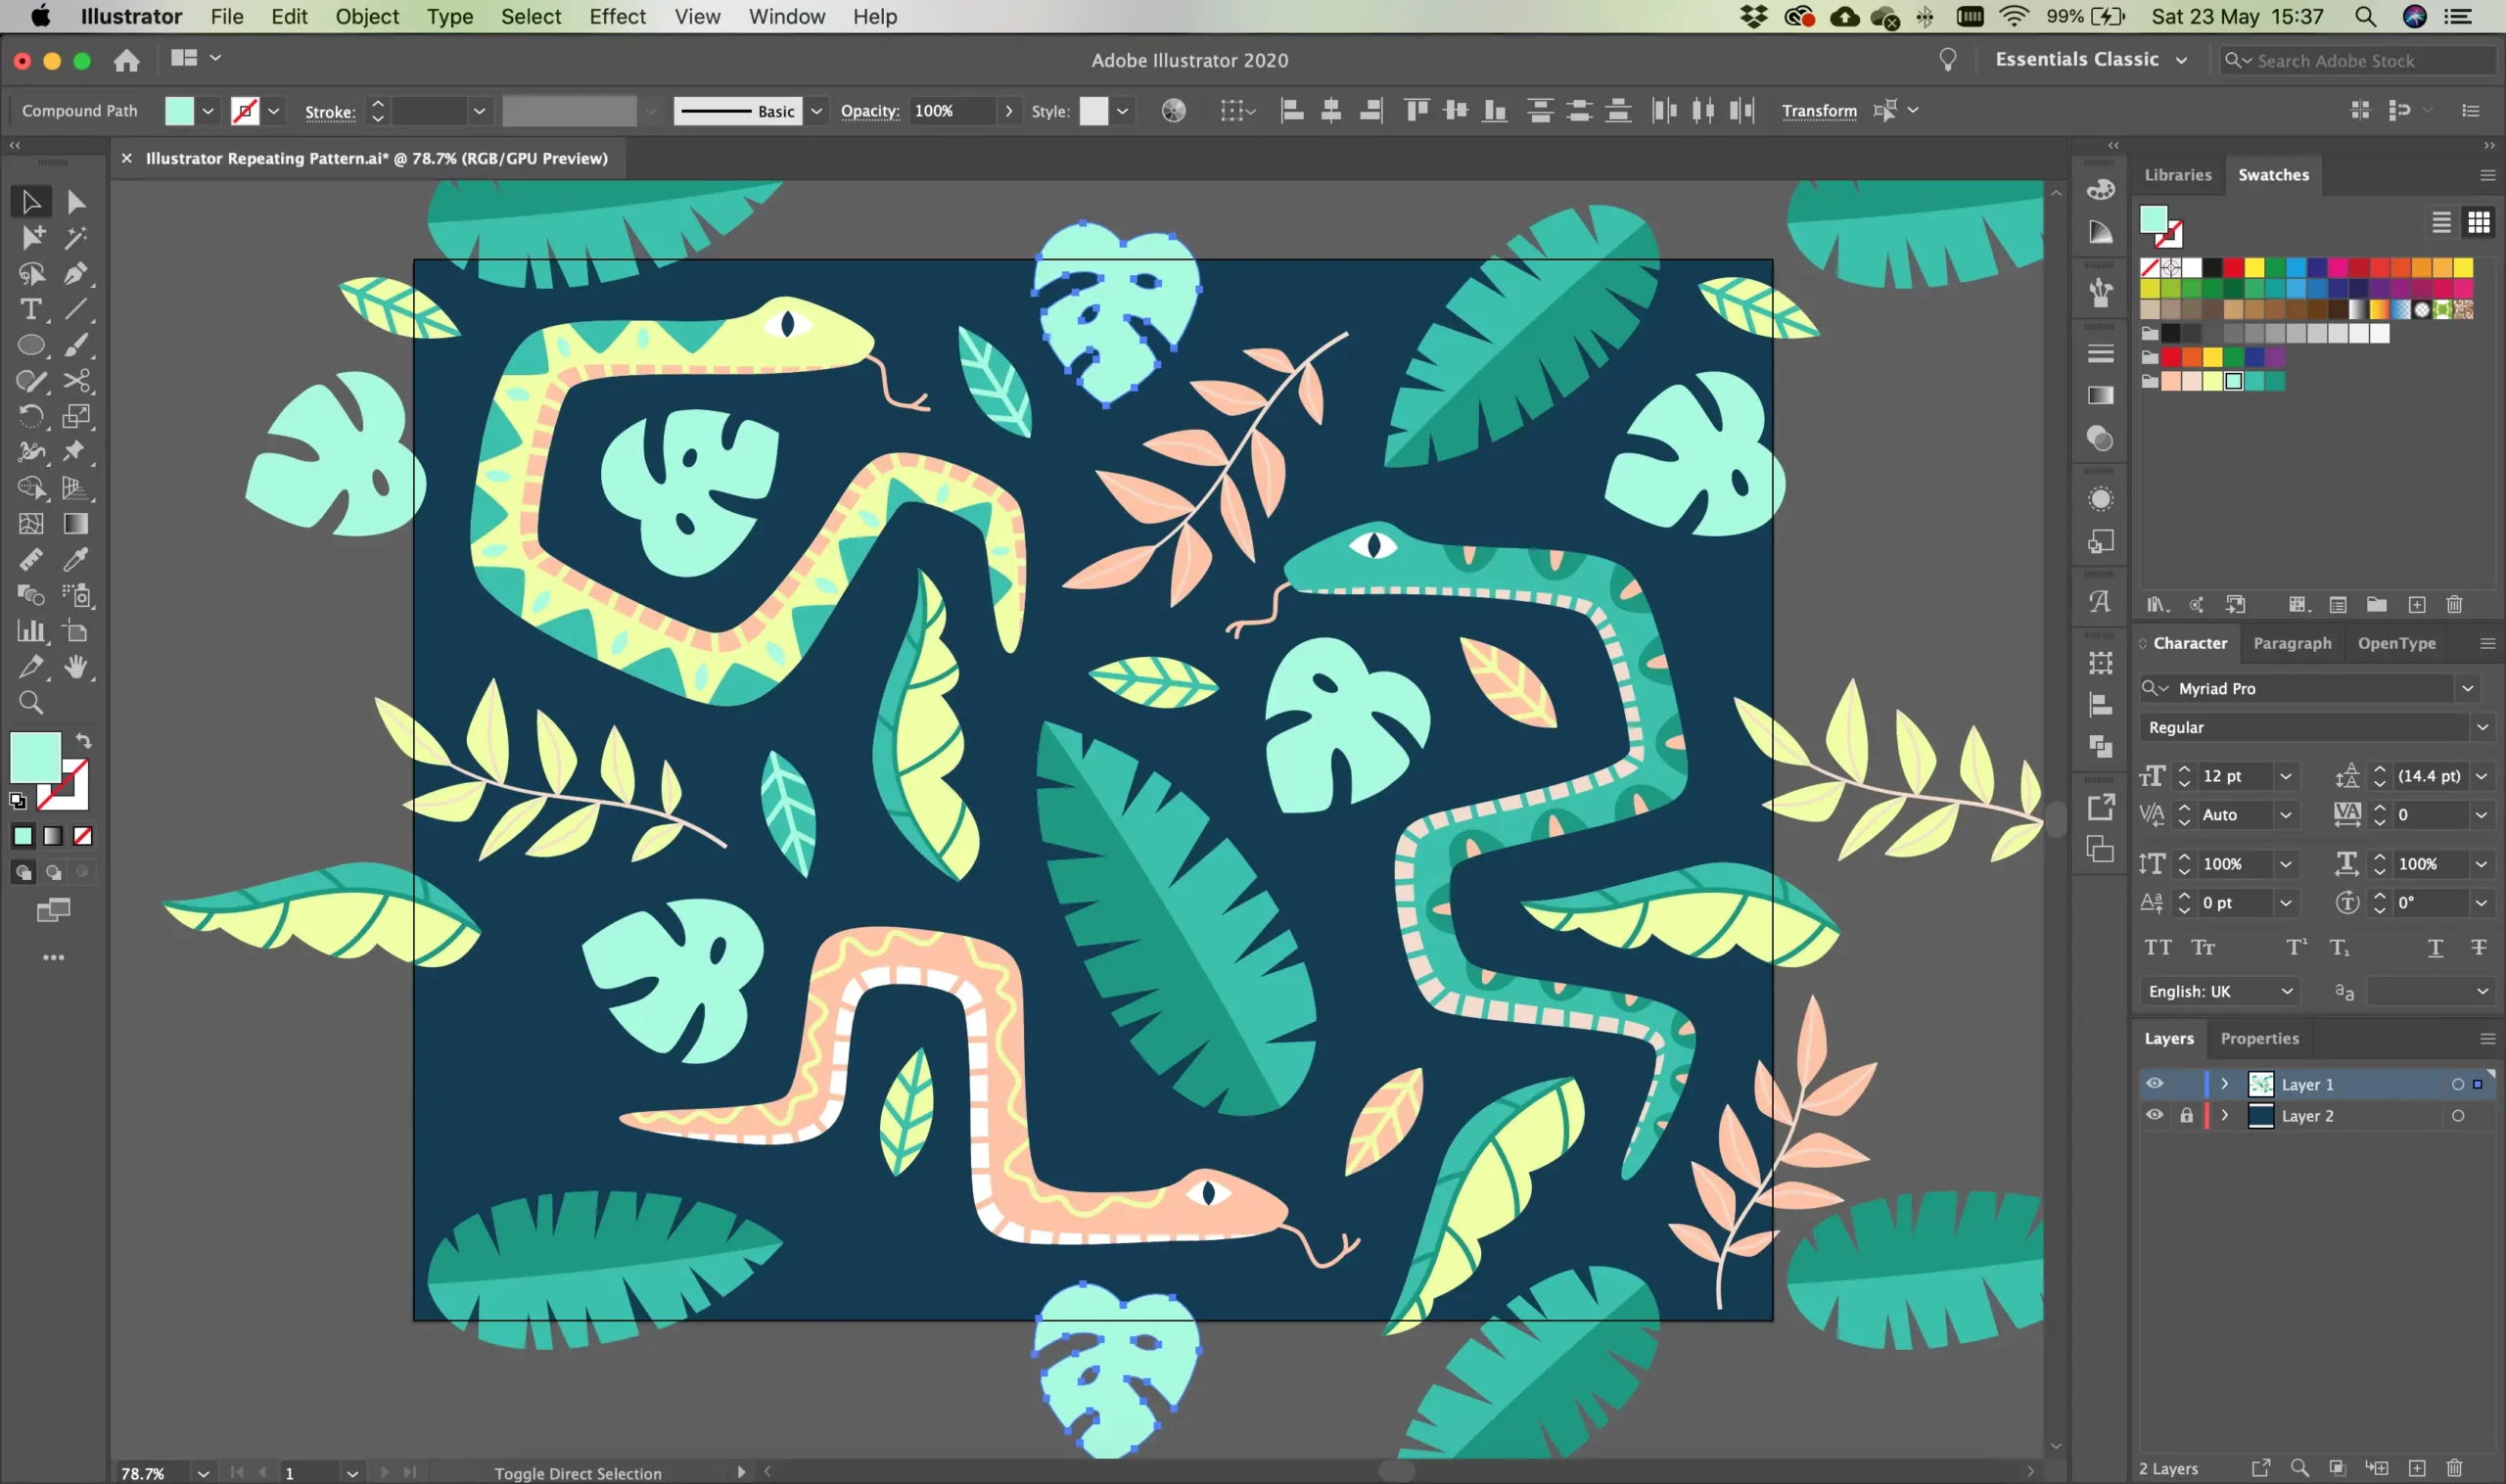
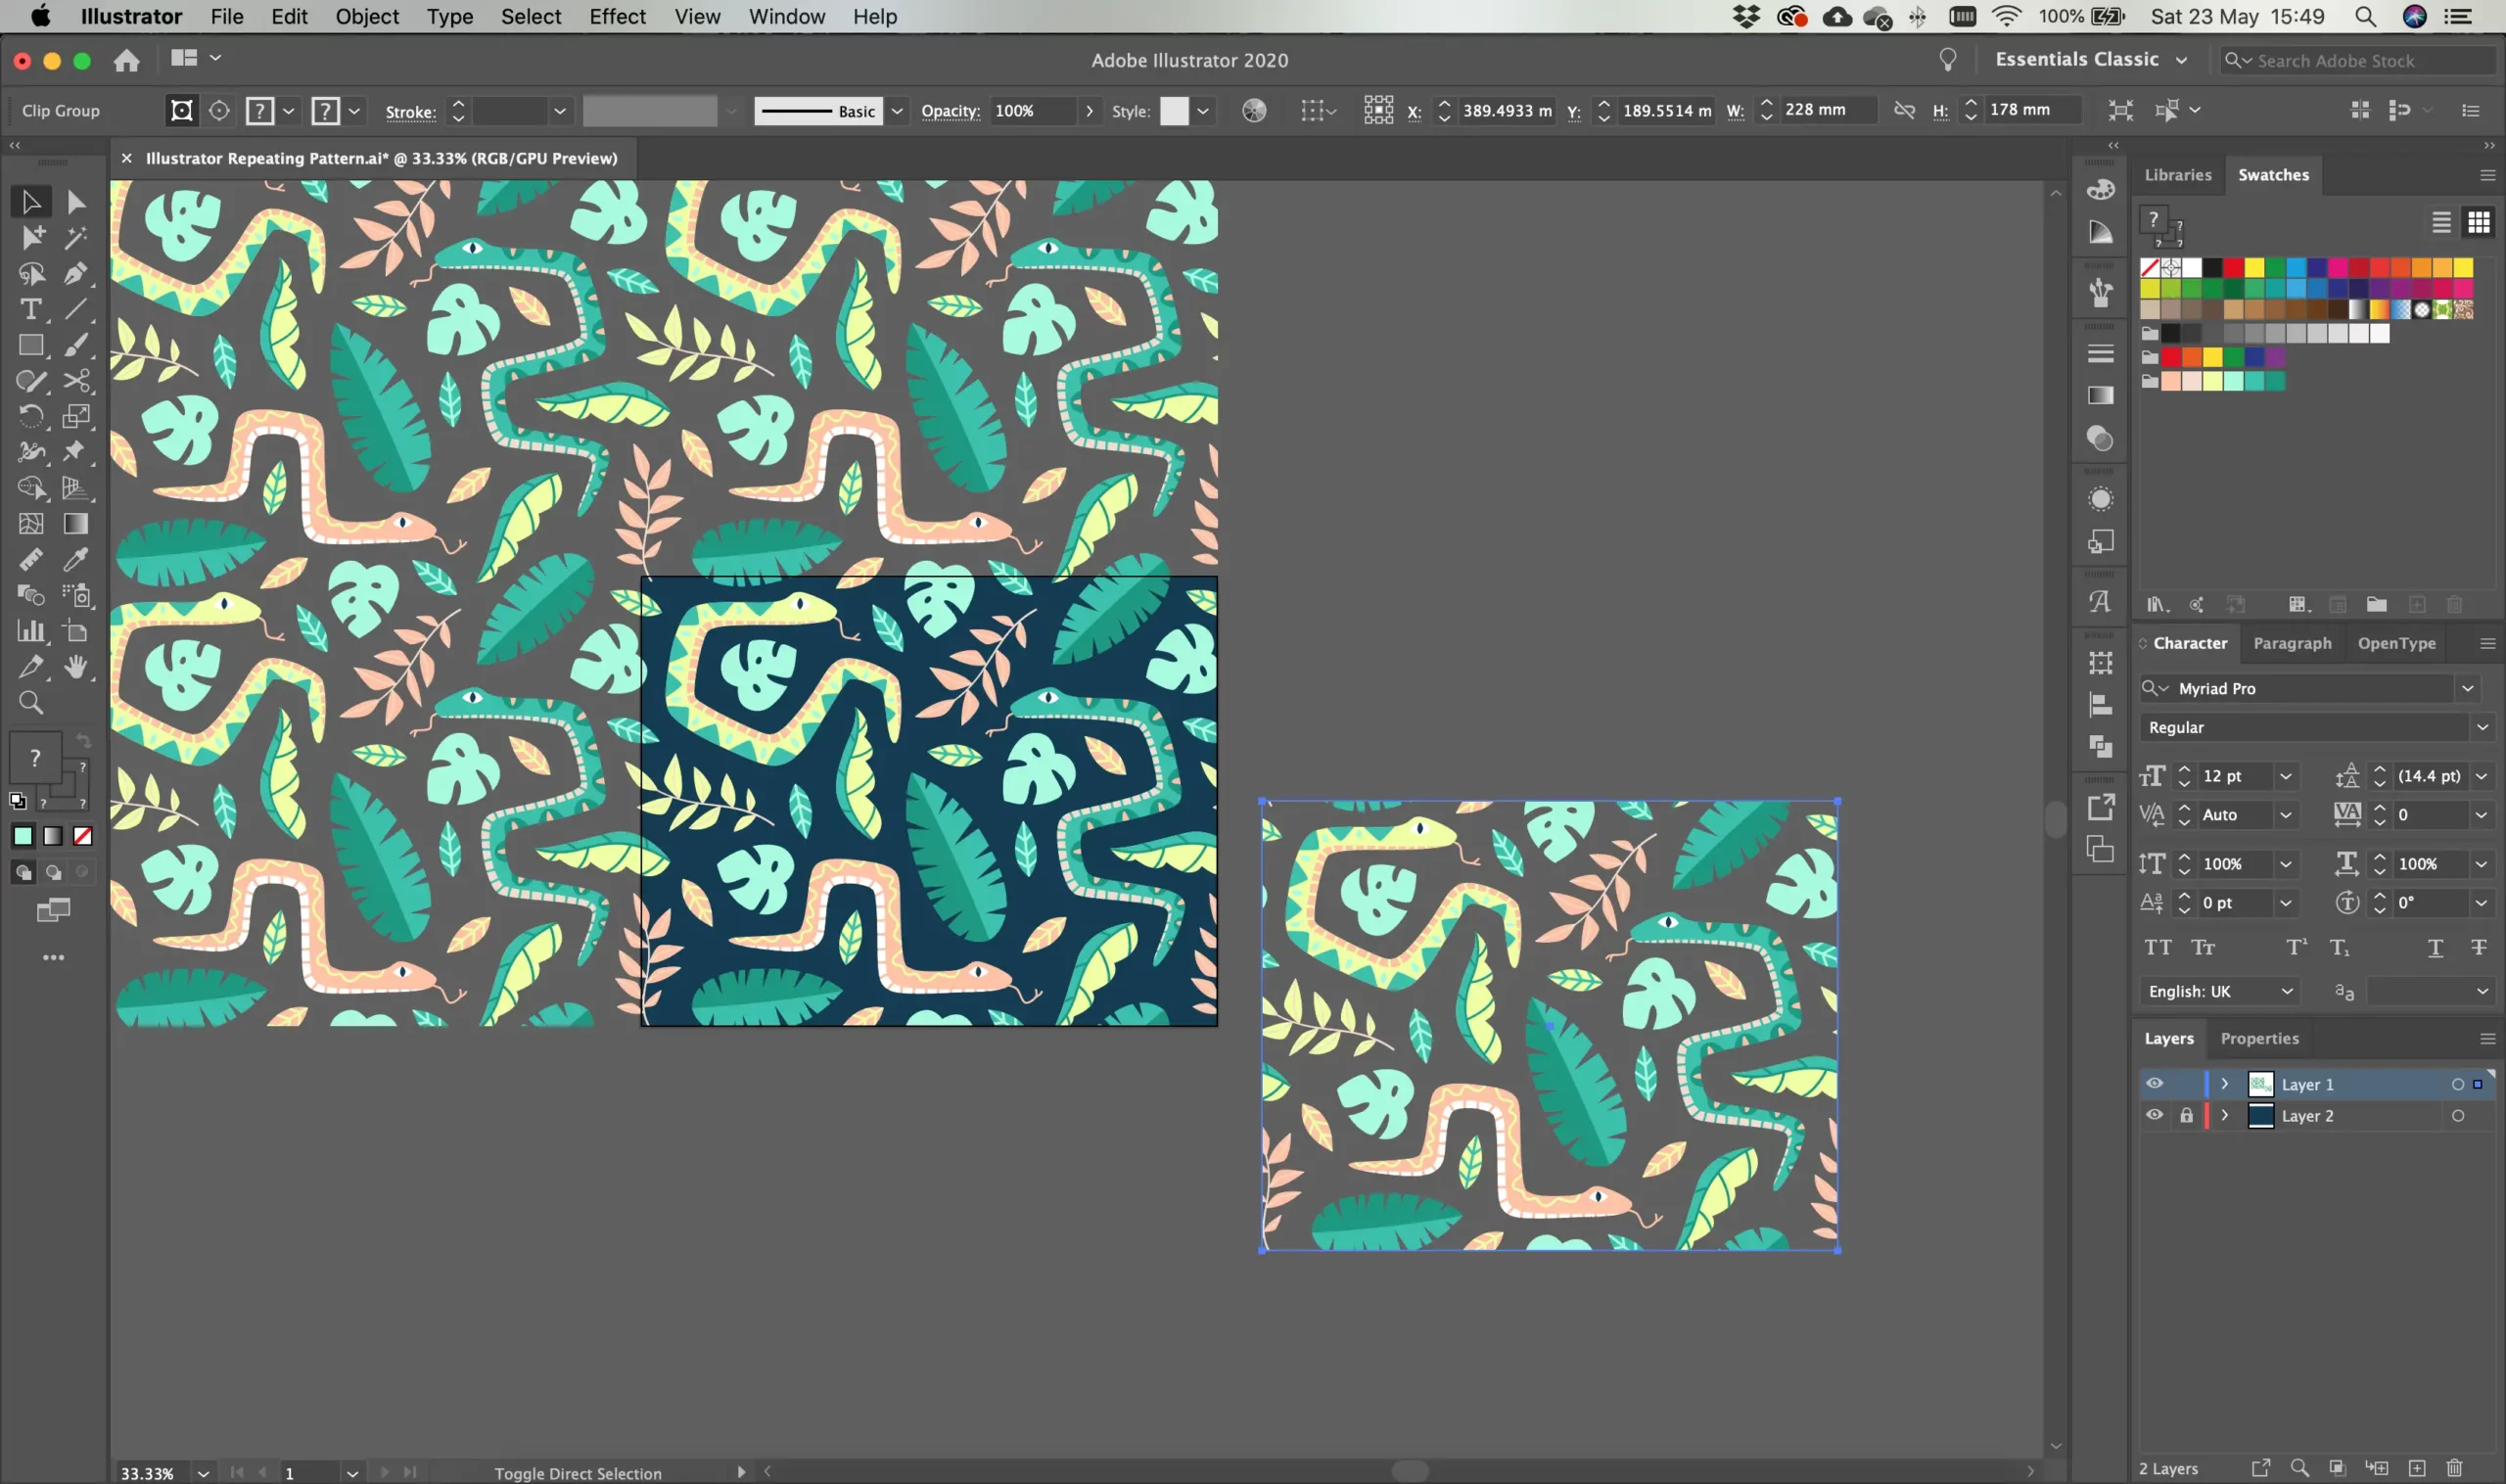
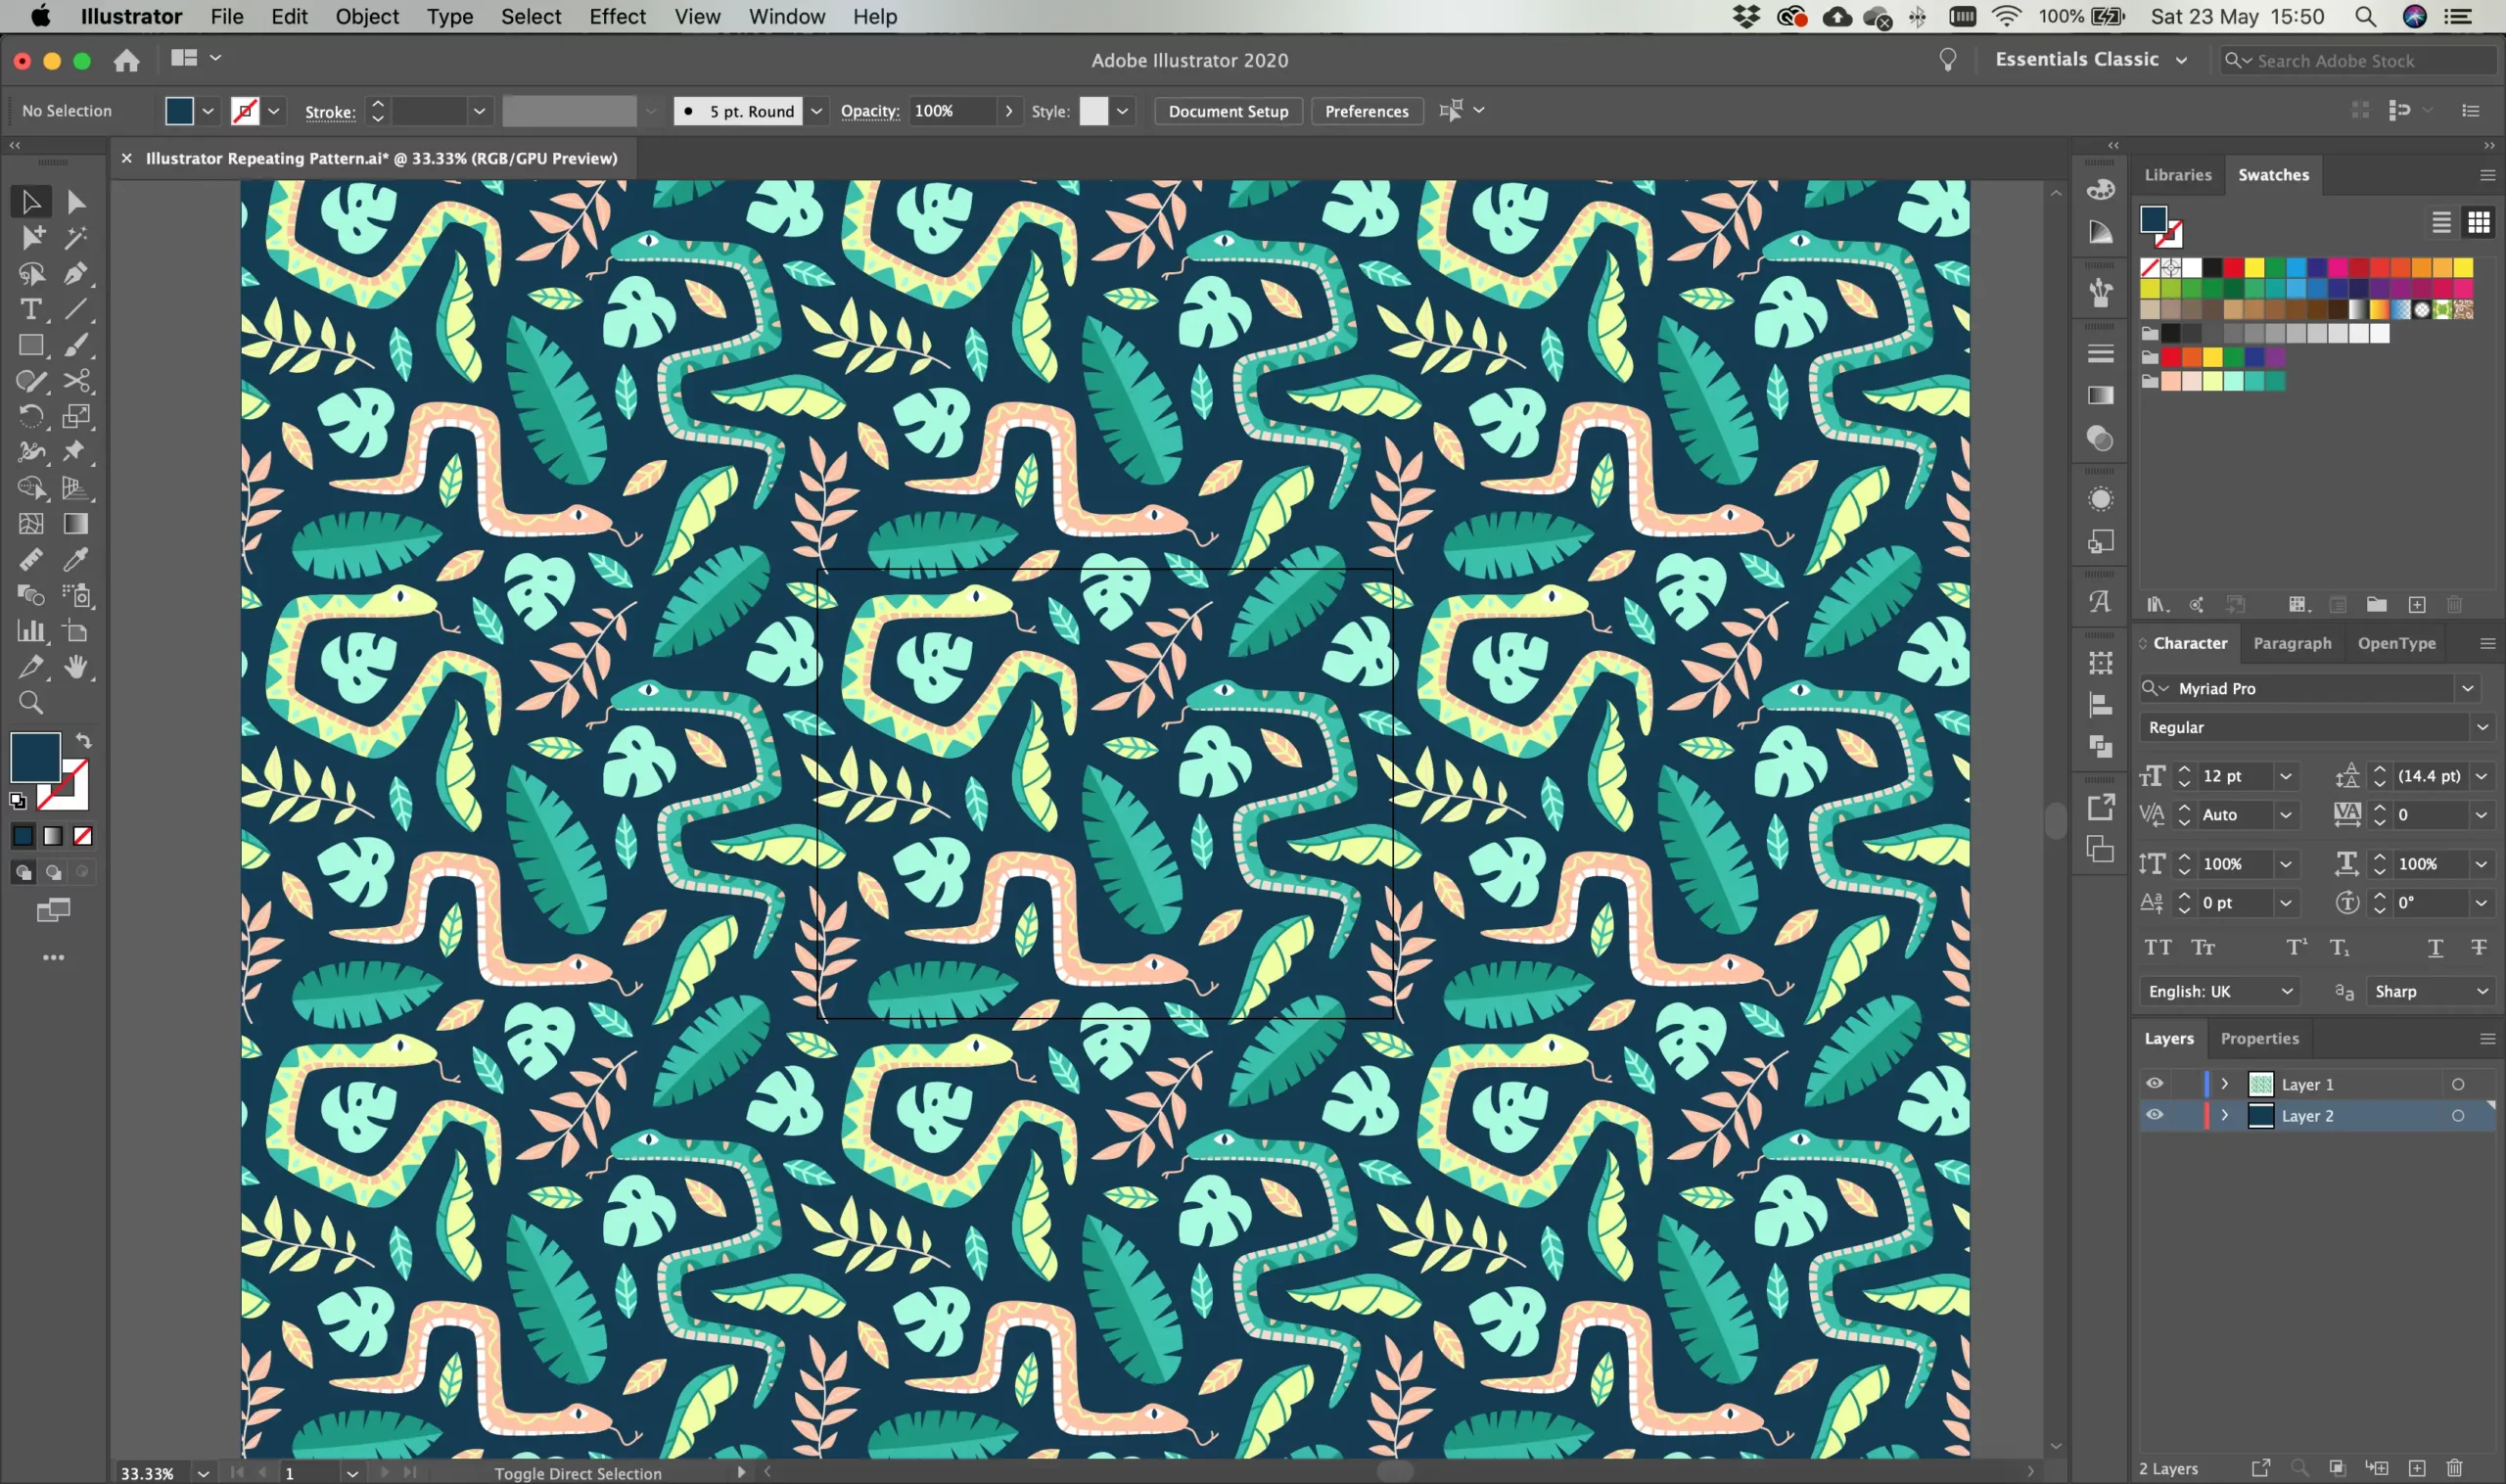
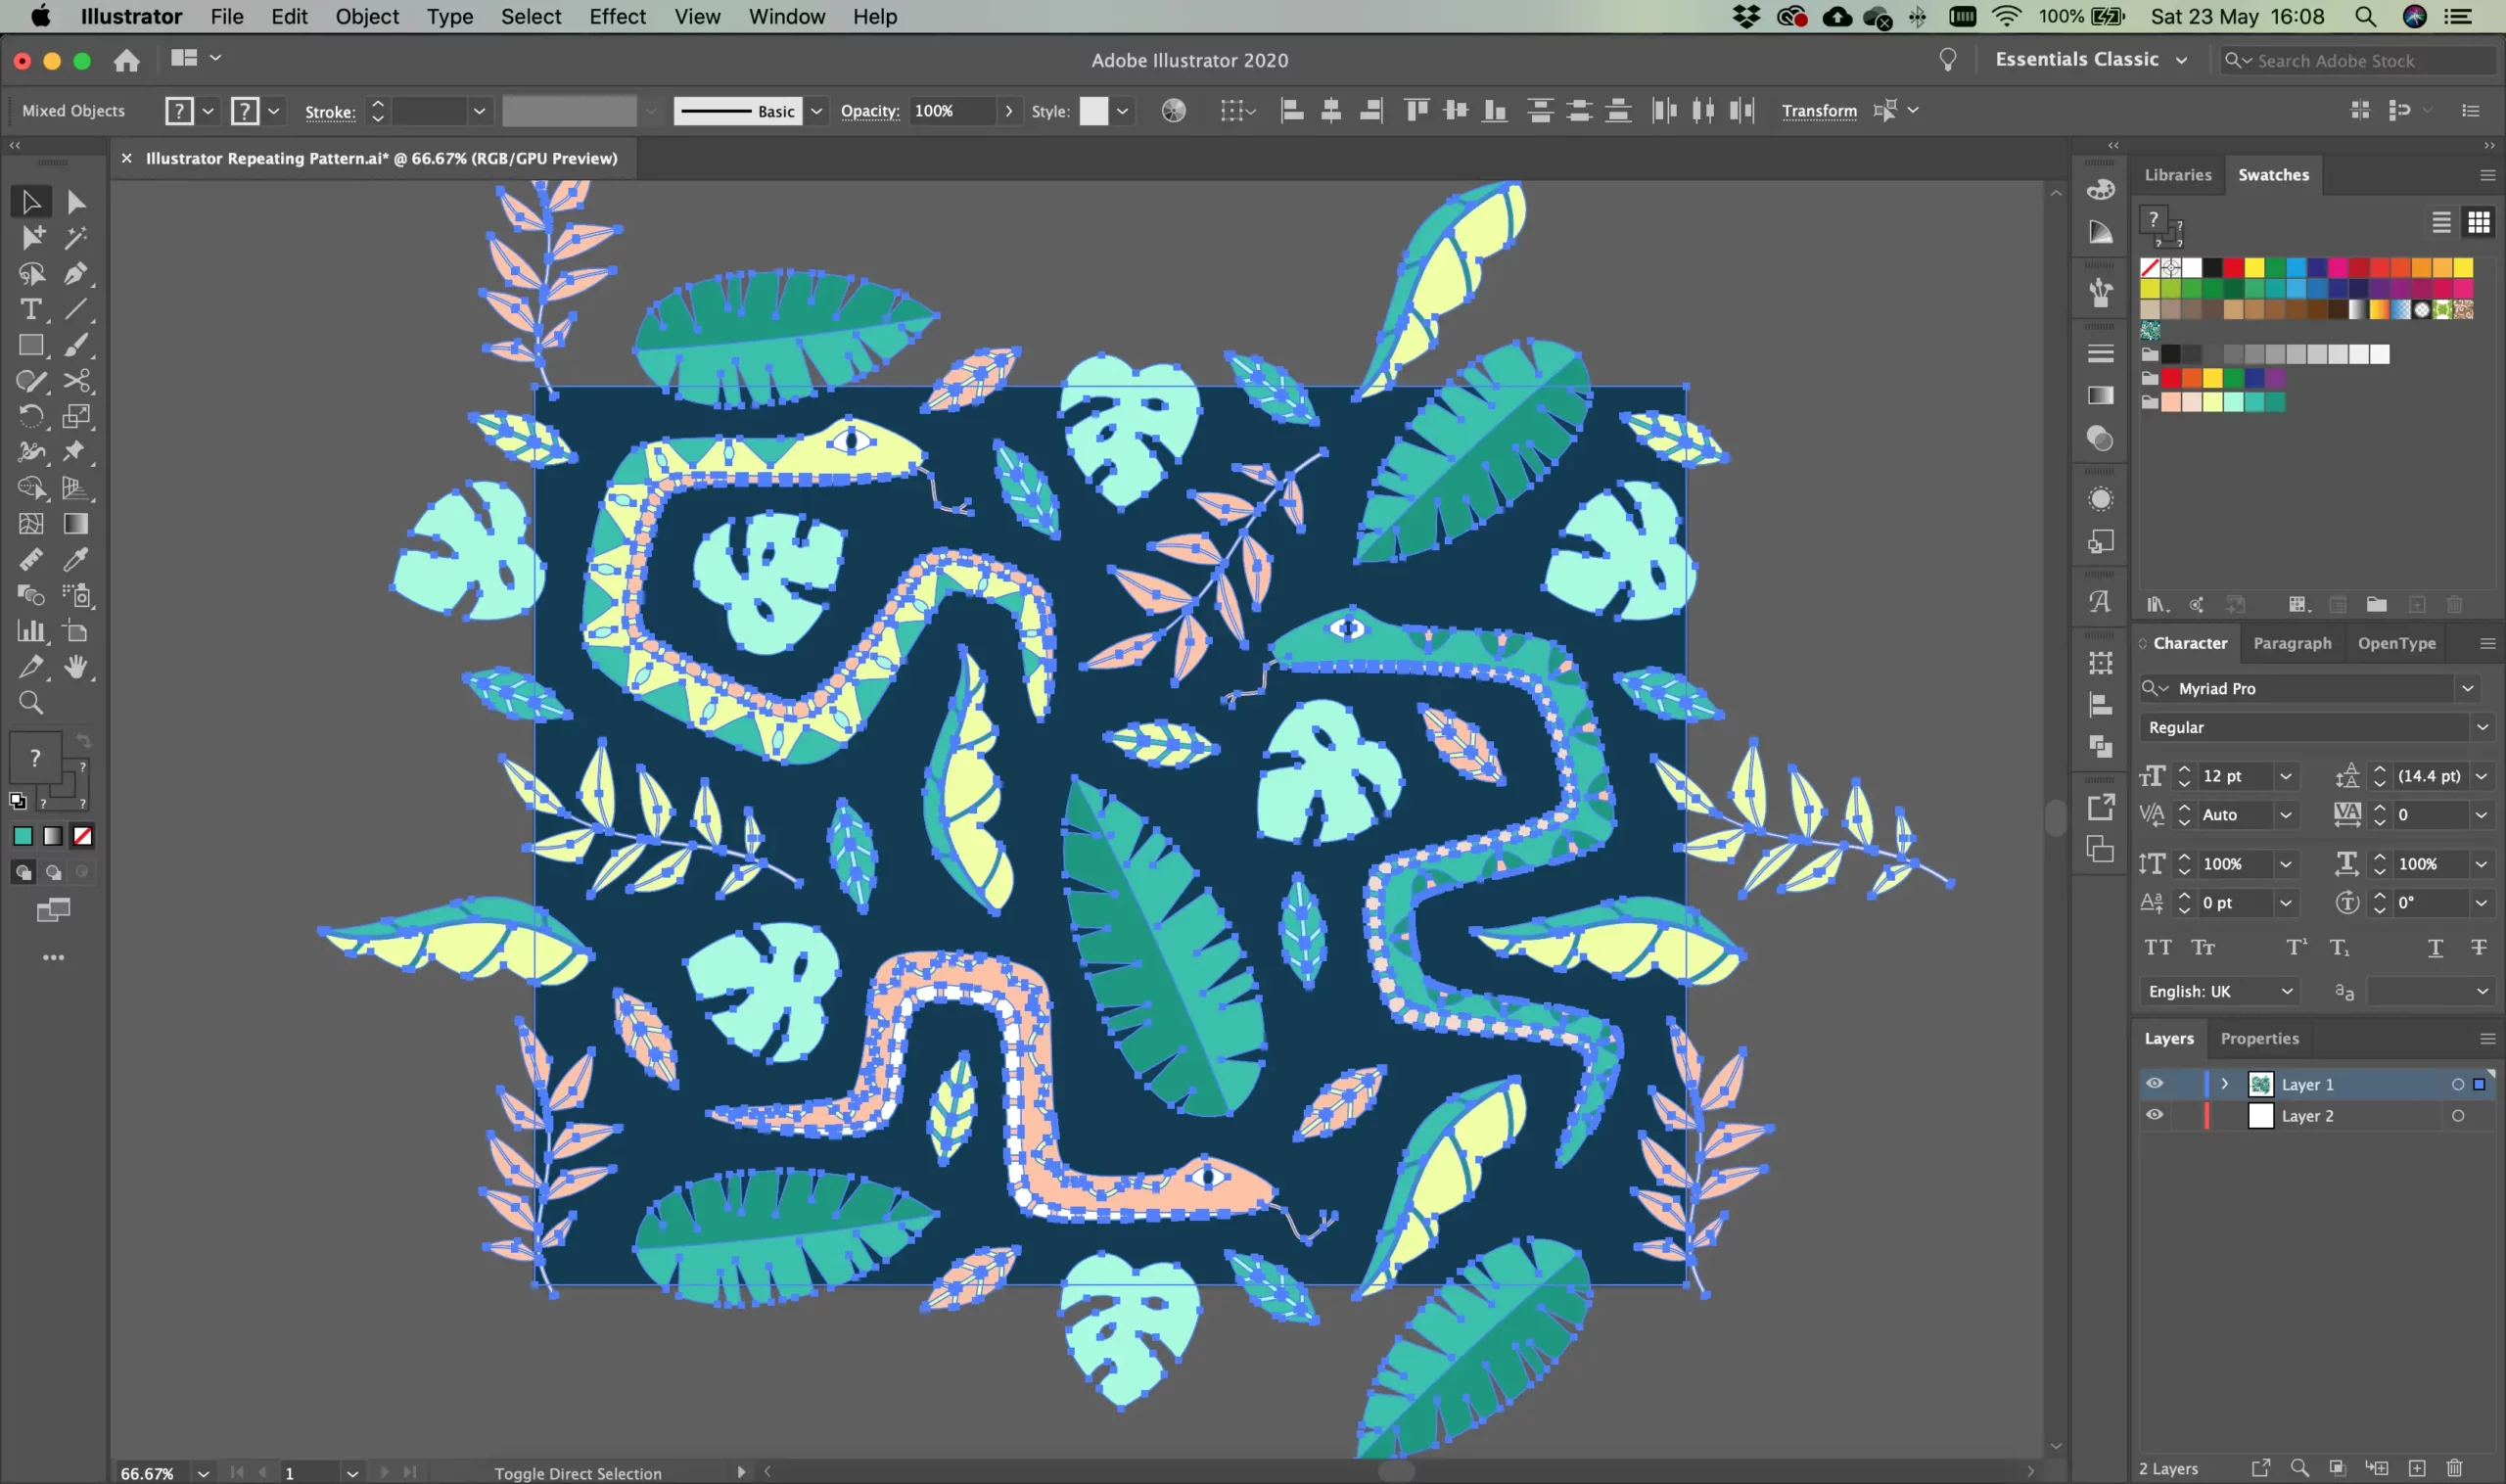
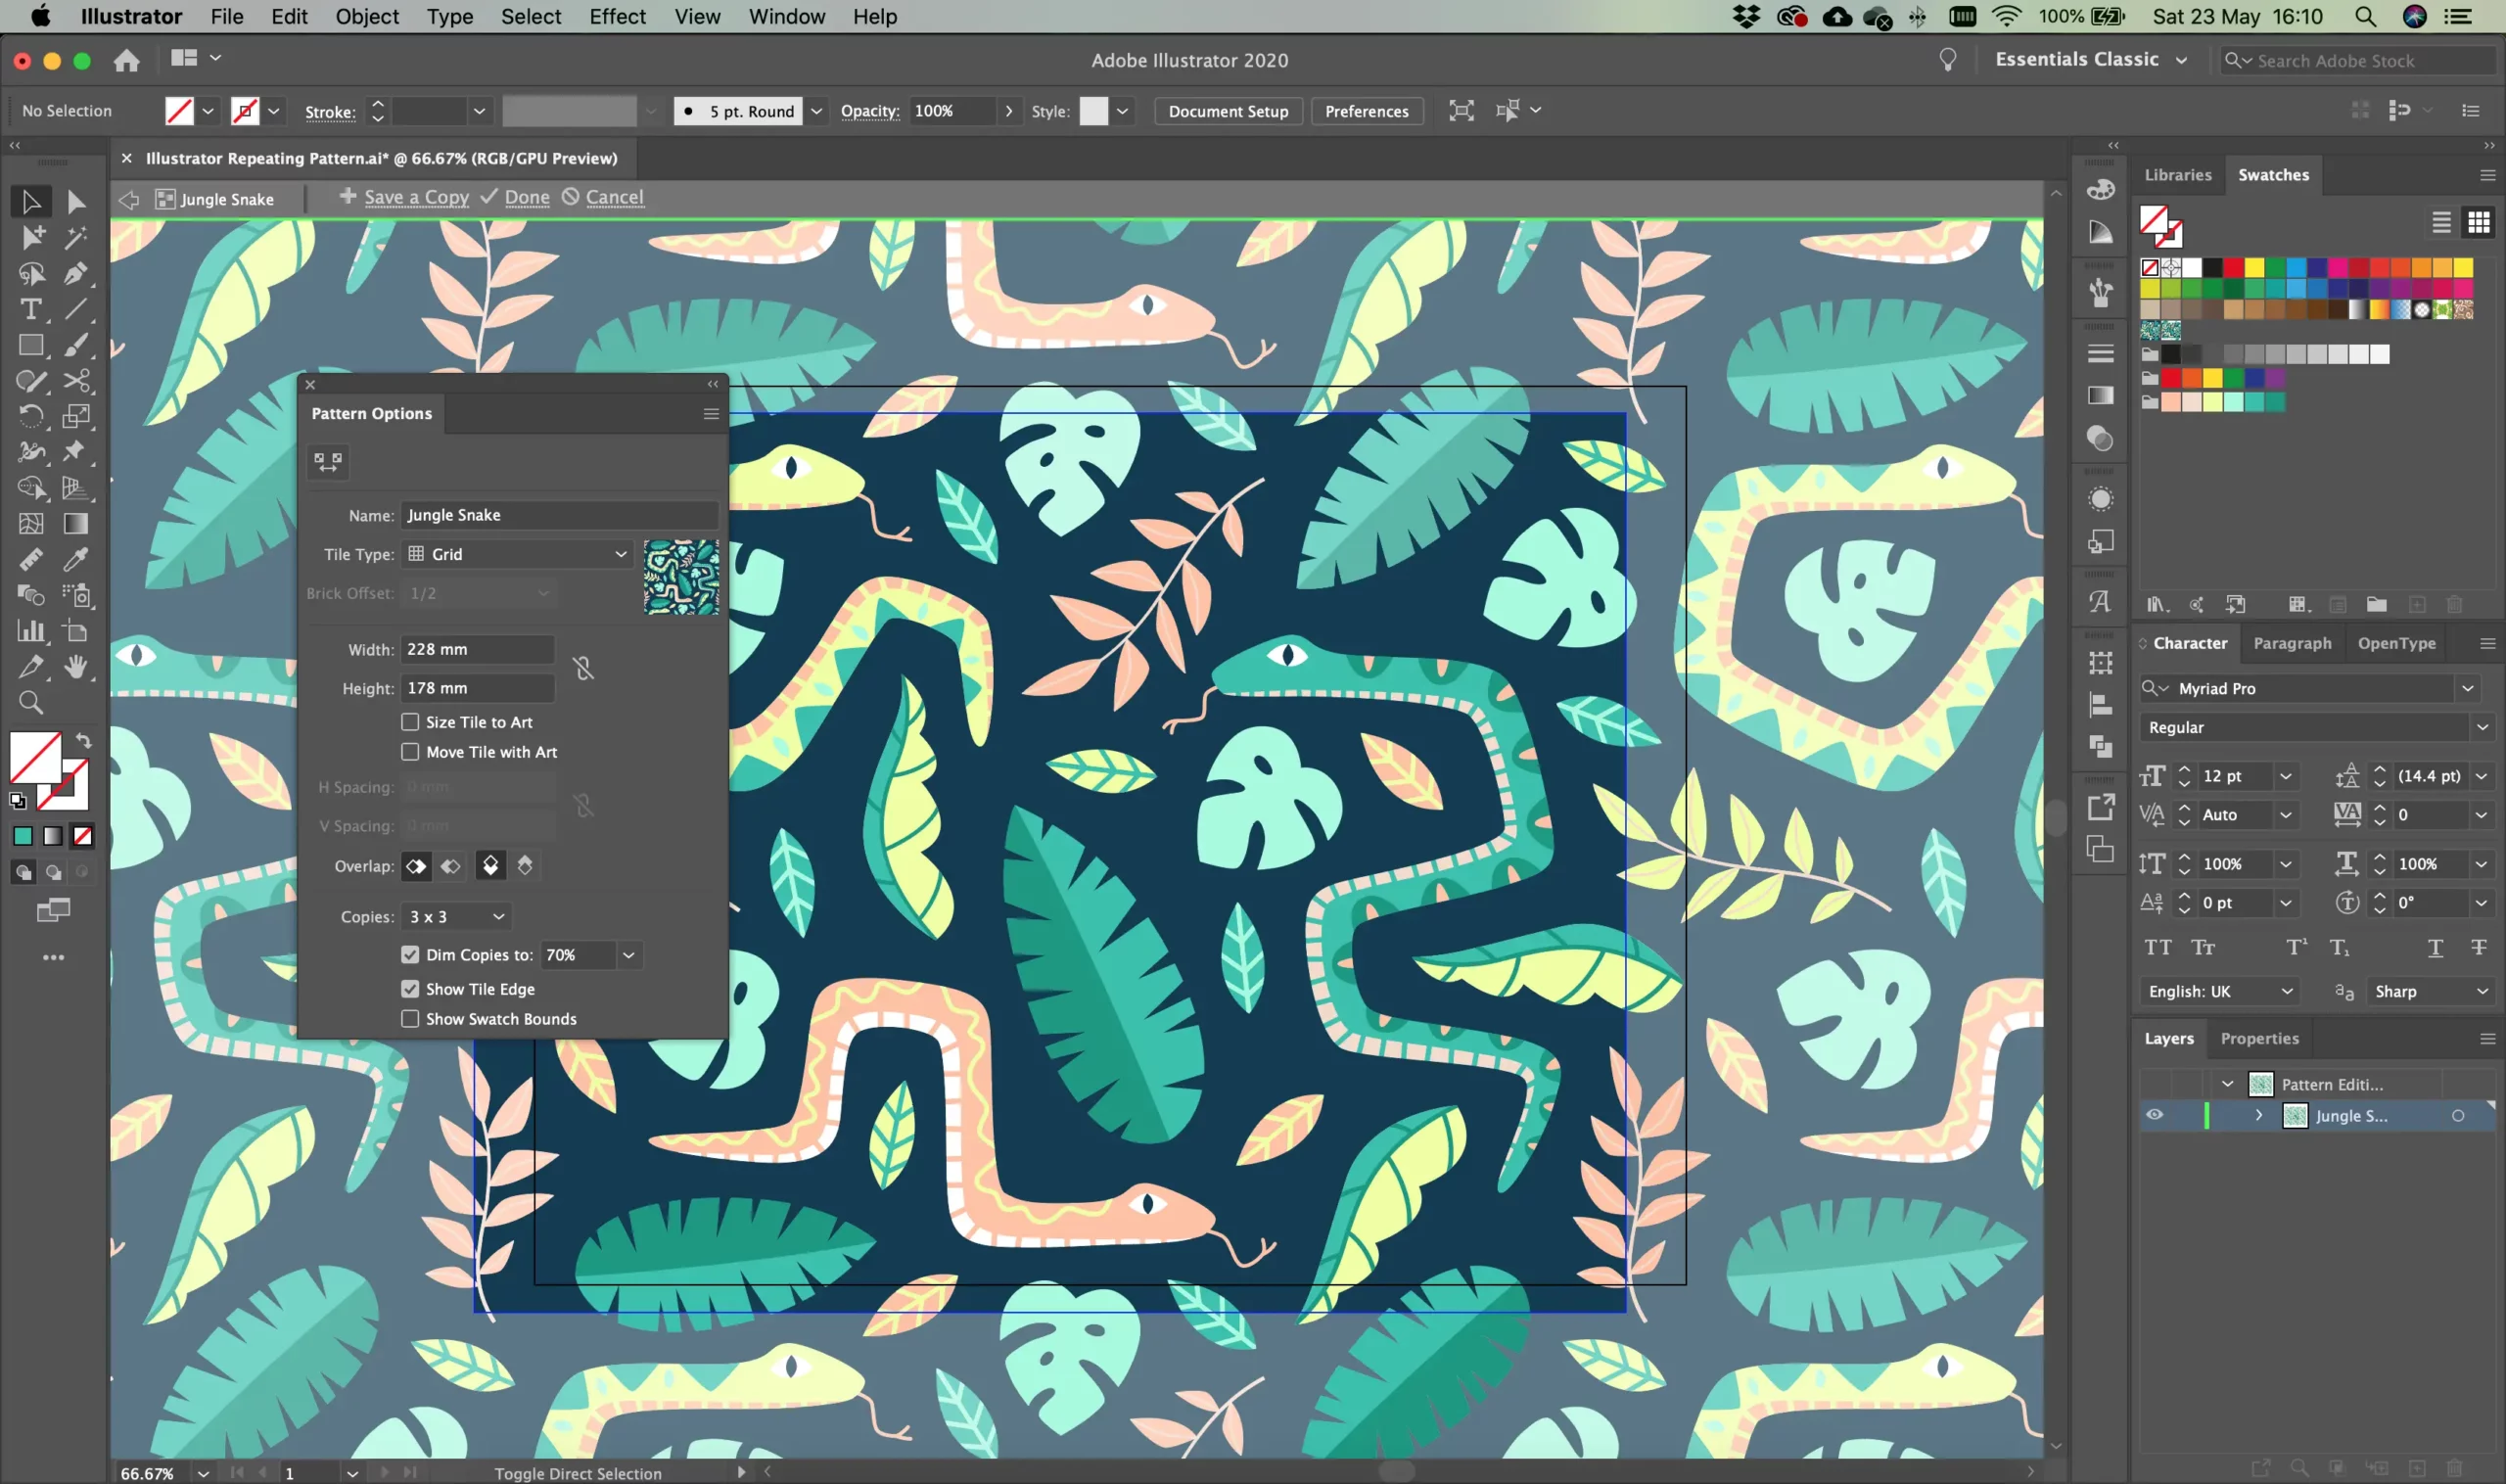
      Zoom out and take a look at your pattern. You want to check that there aren’t any strange gaps, objects where they shouldn’t be, motifs that haven’t been copied to the opposite edge etc. I like to do a squint test – this helps me to look at the overall shape of the pattern than the objects themselves. Sometimes you find that the eye is draw to unanticipated places, such as four objects in a perfect line where they shouldn’t be, or an oddly square gap.

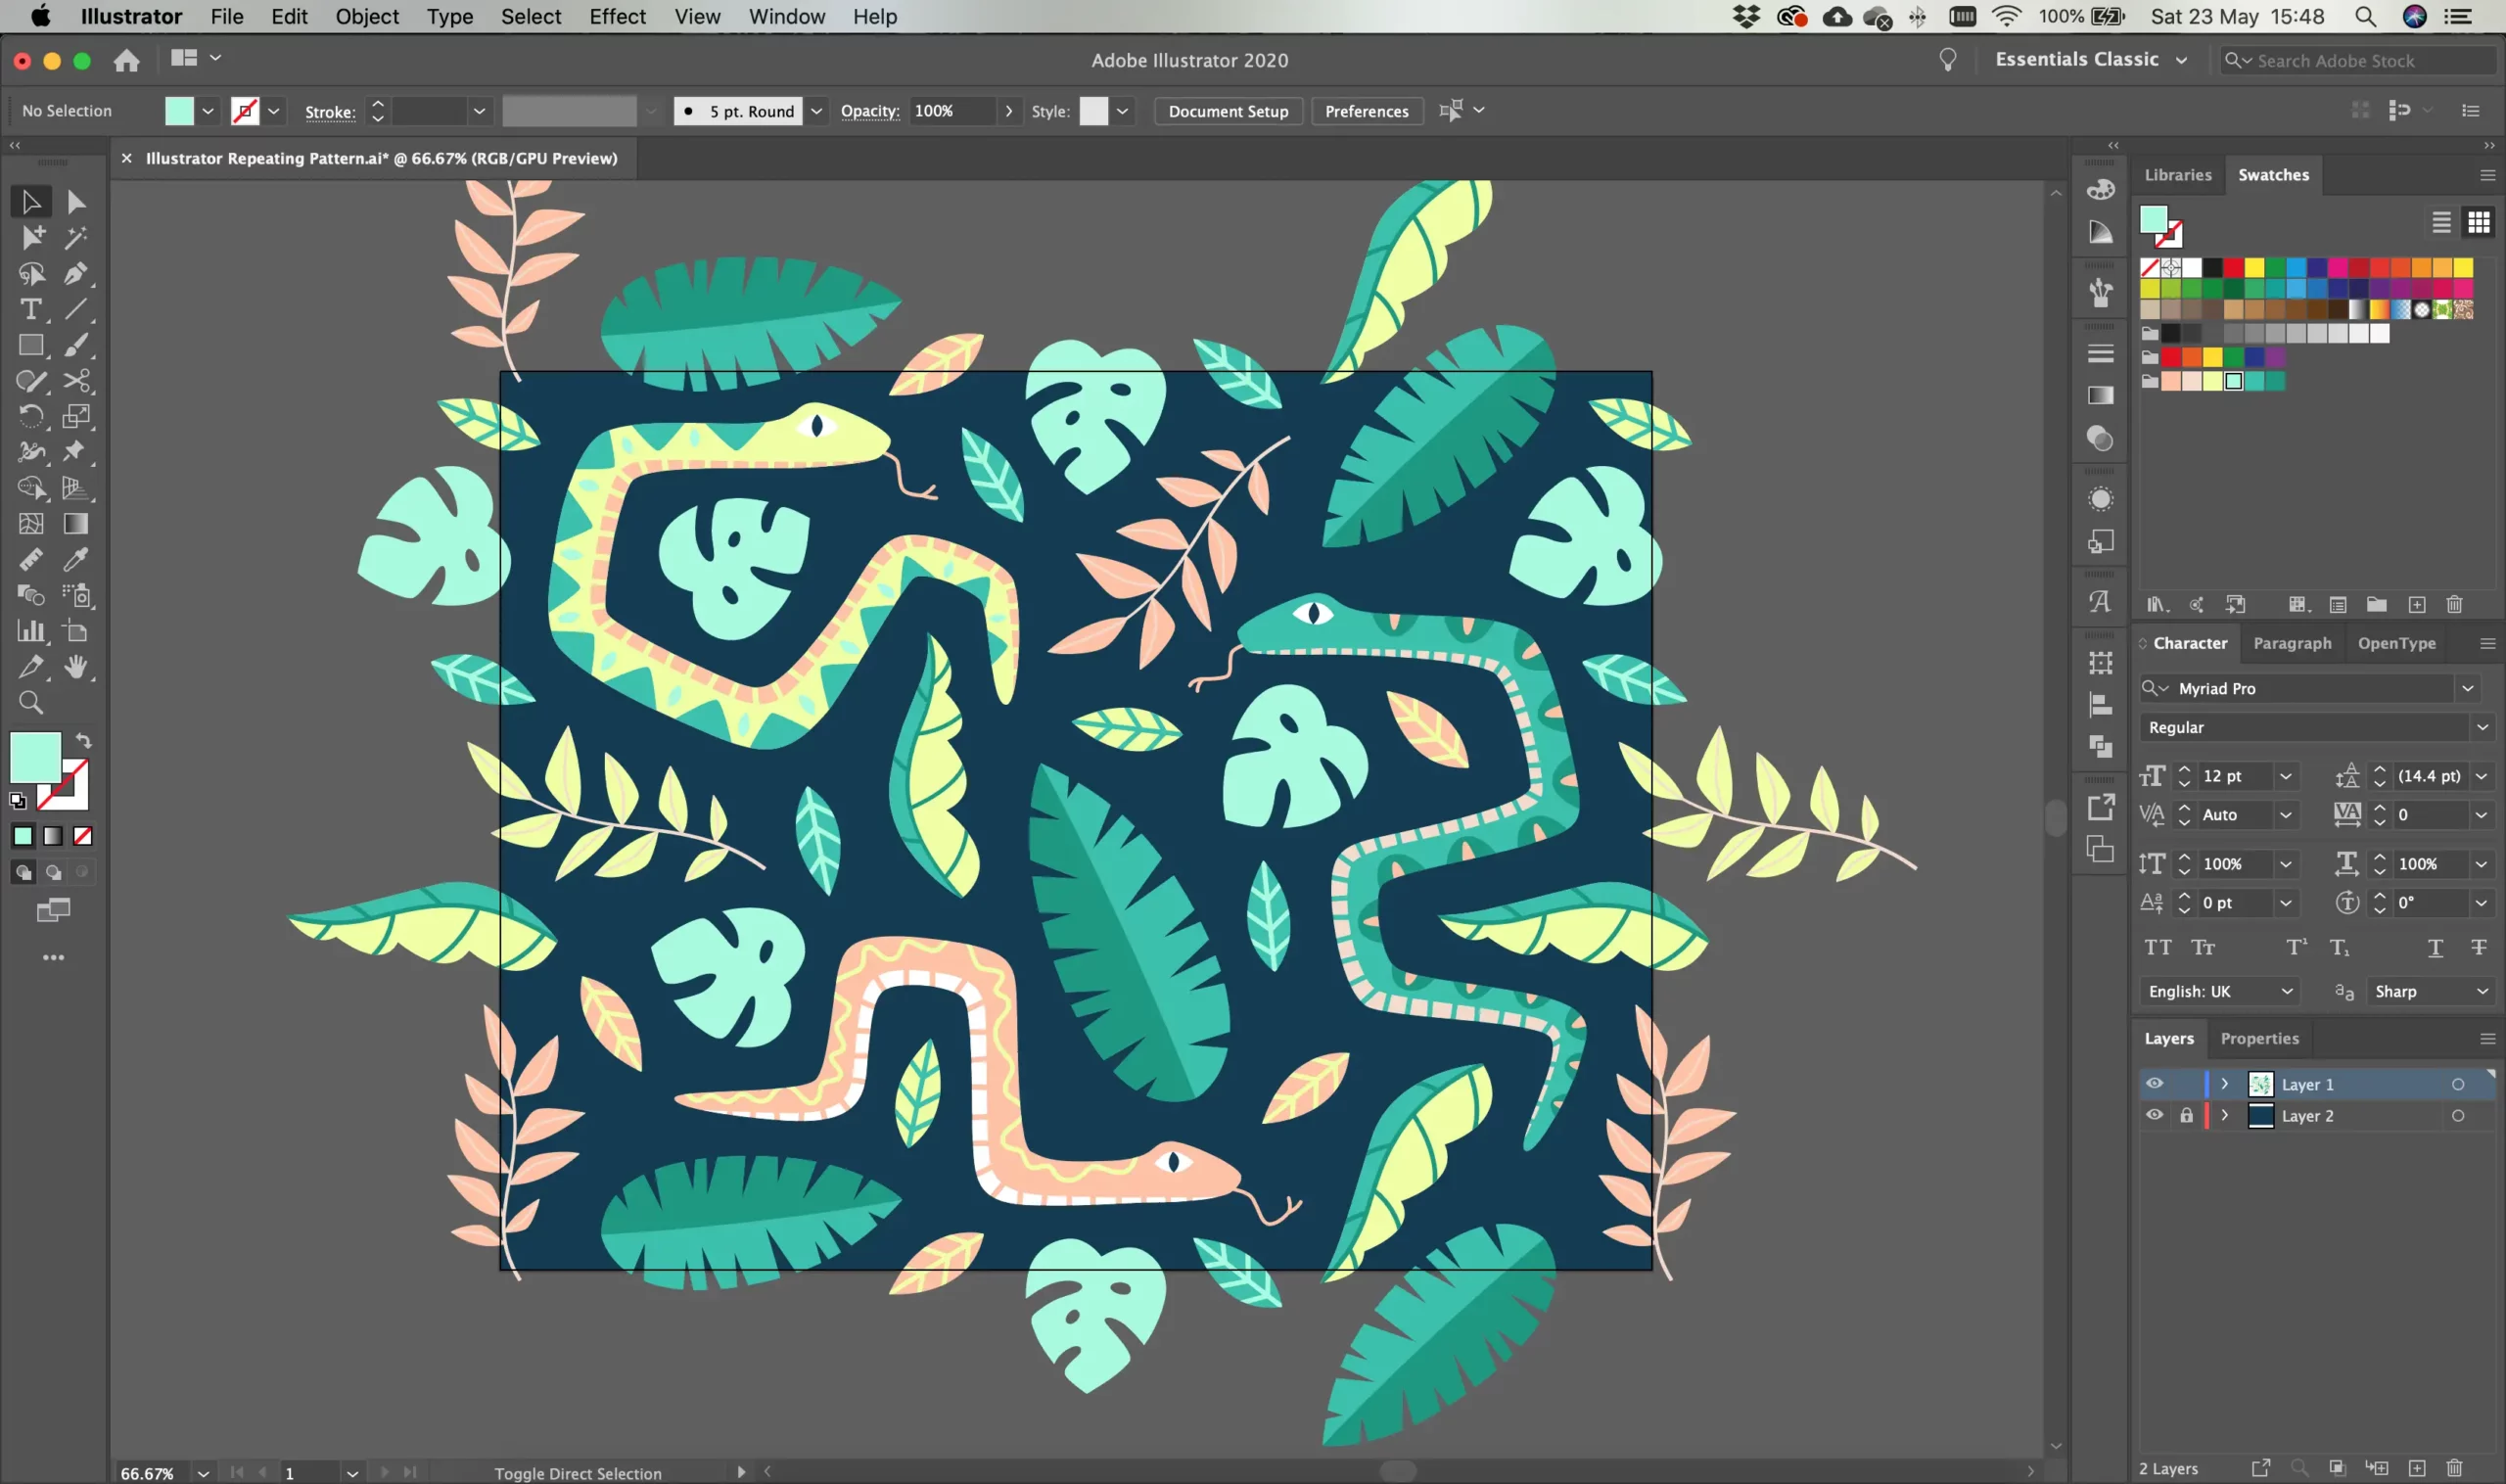
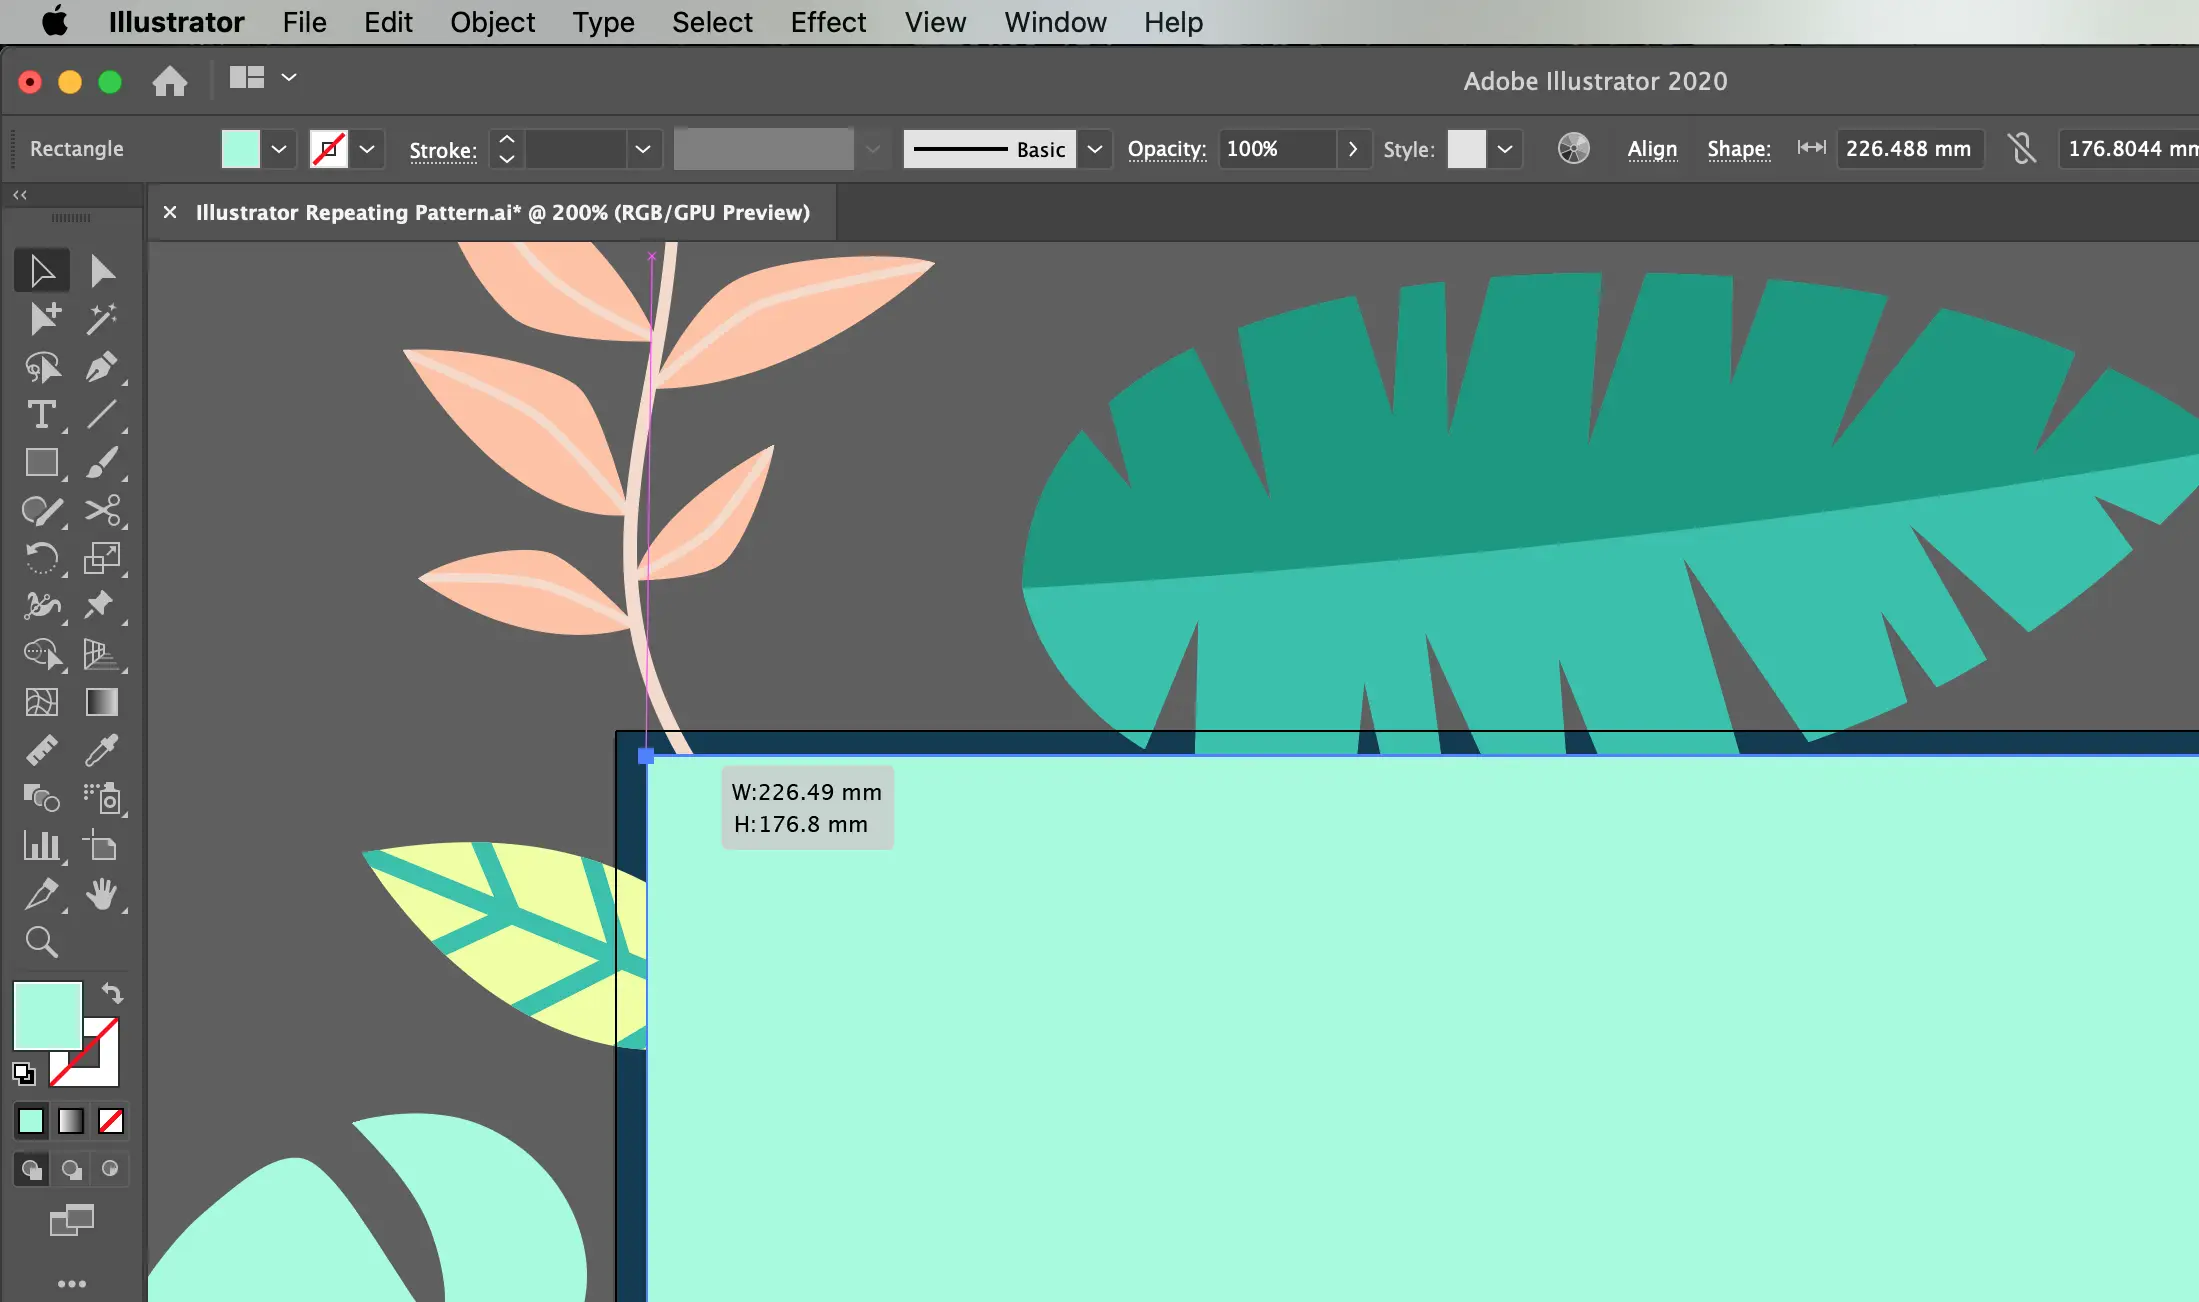
      Zoom right in and check that the repeat is seamless. There should be no misalignment between objects and no gaps.

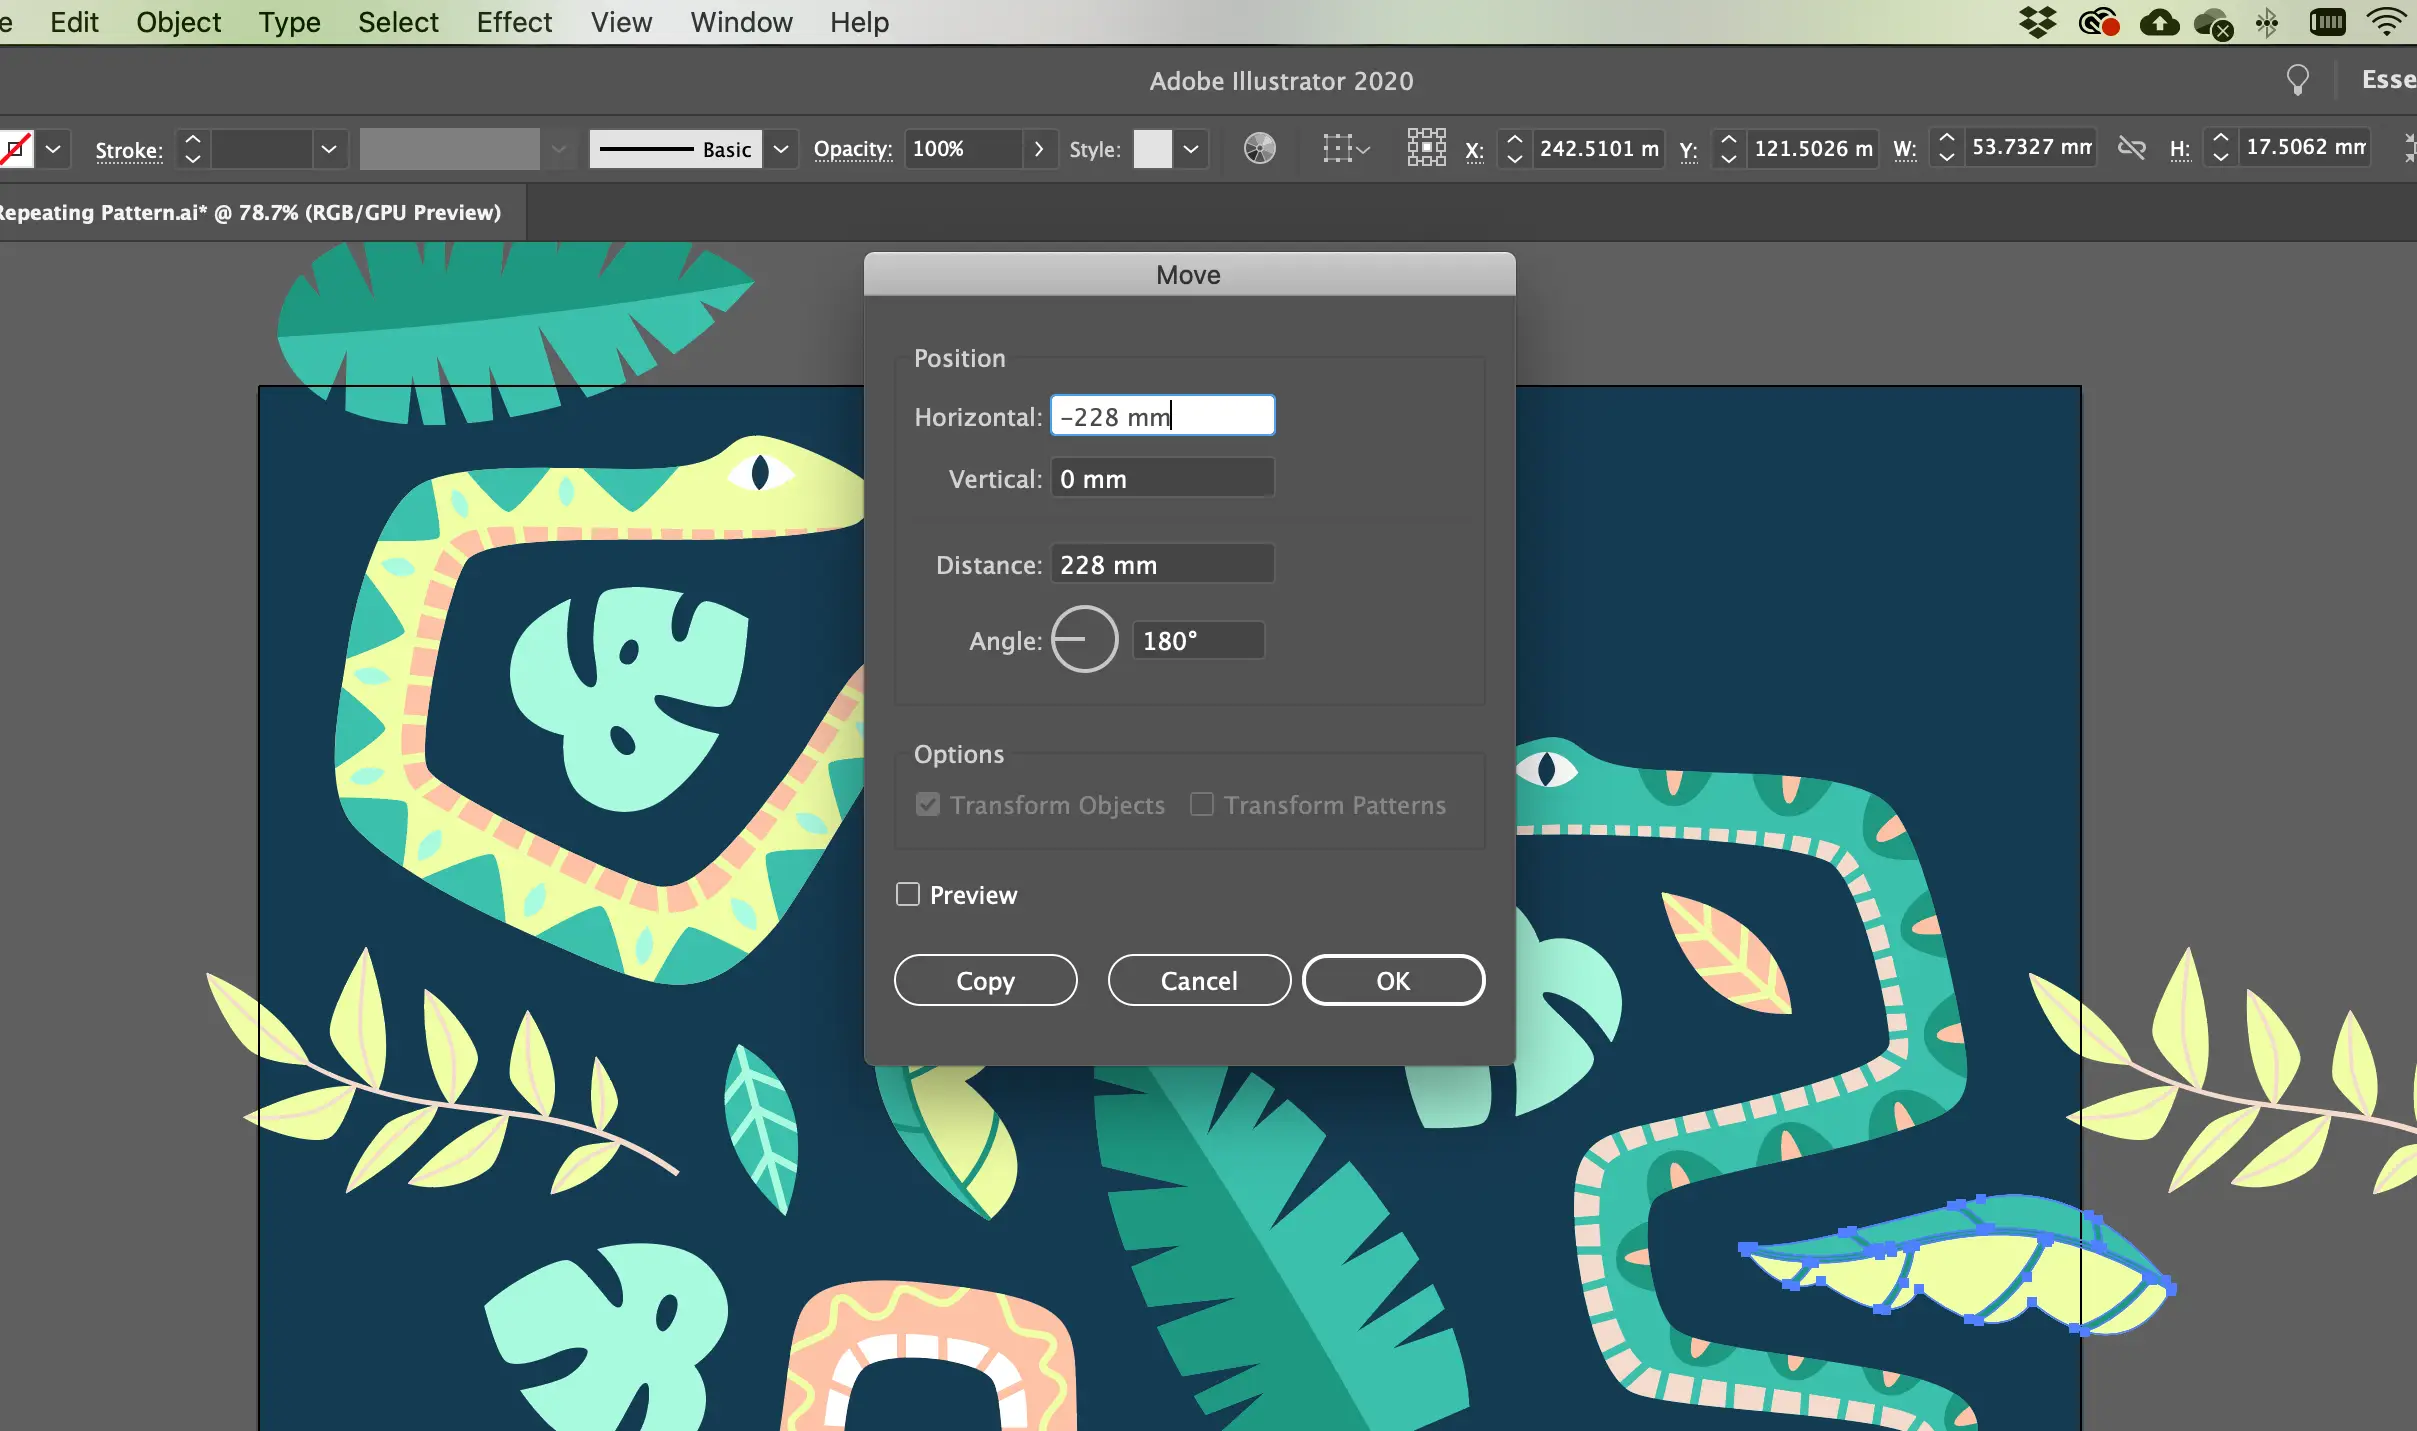
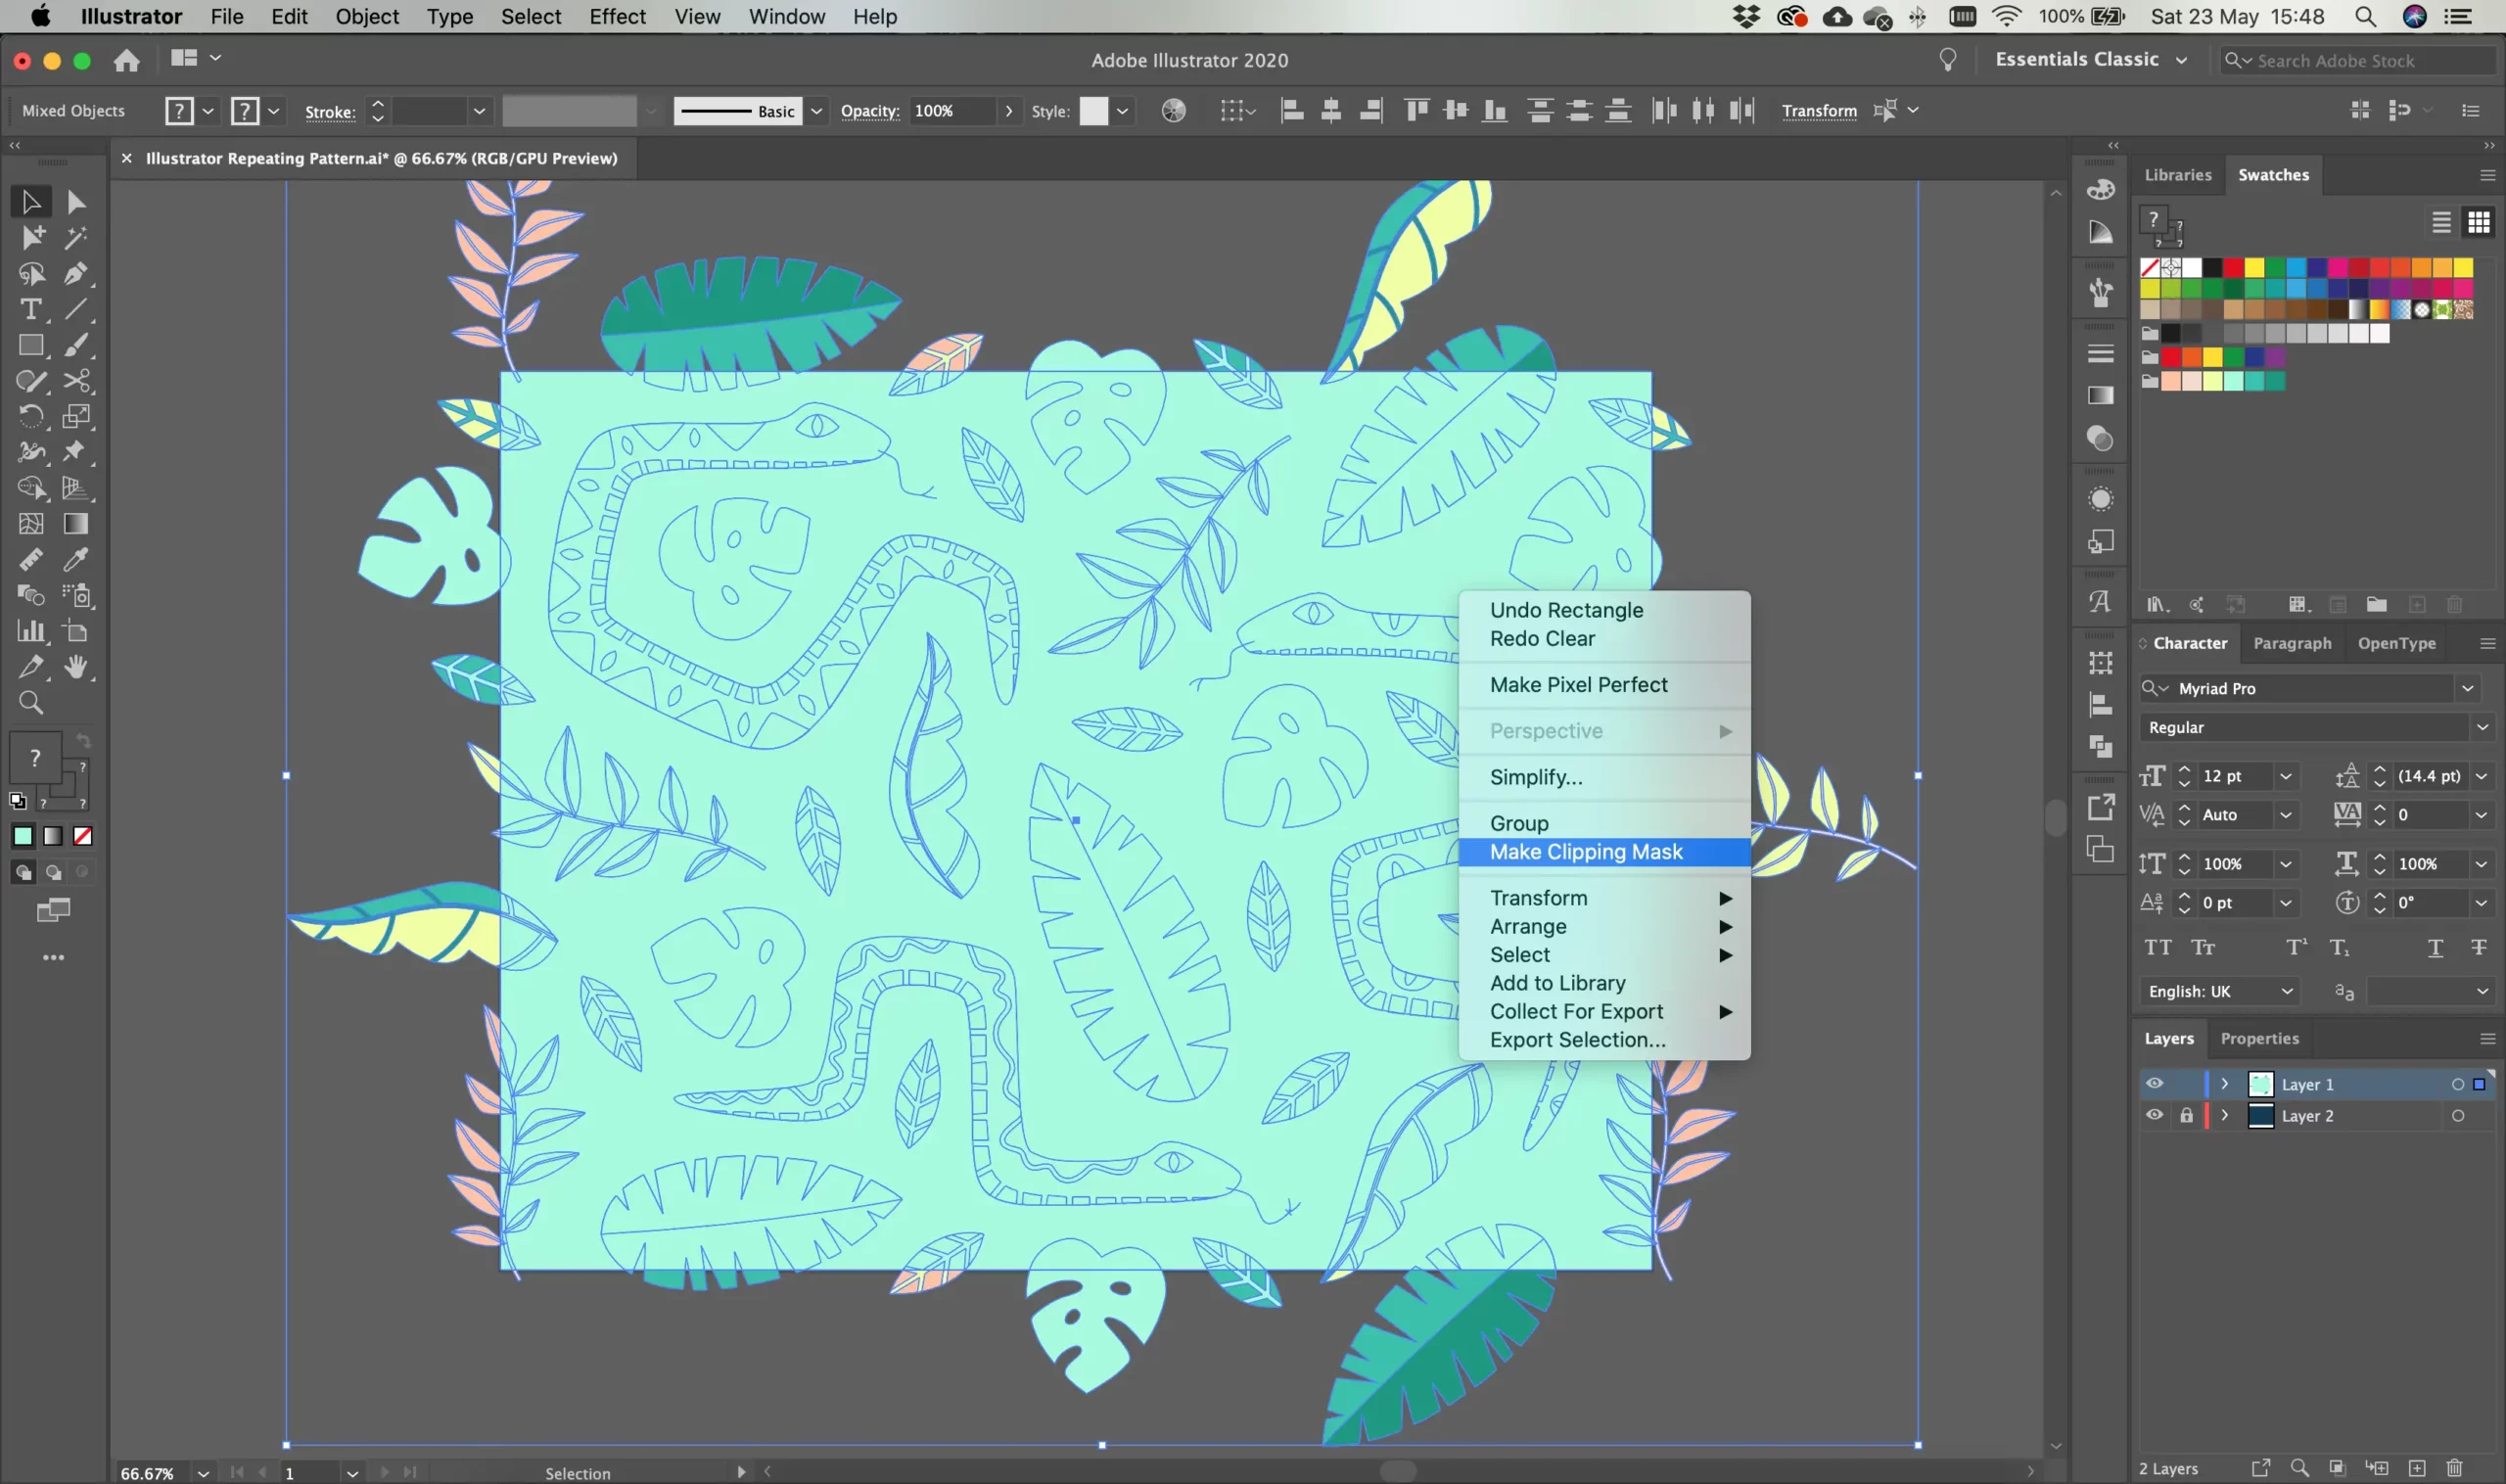
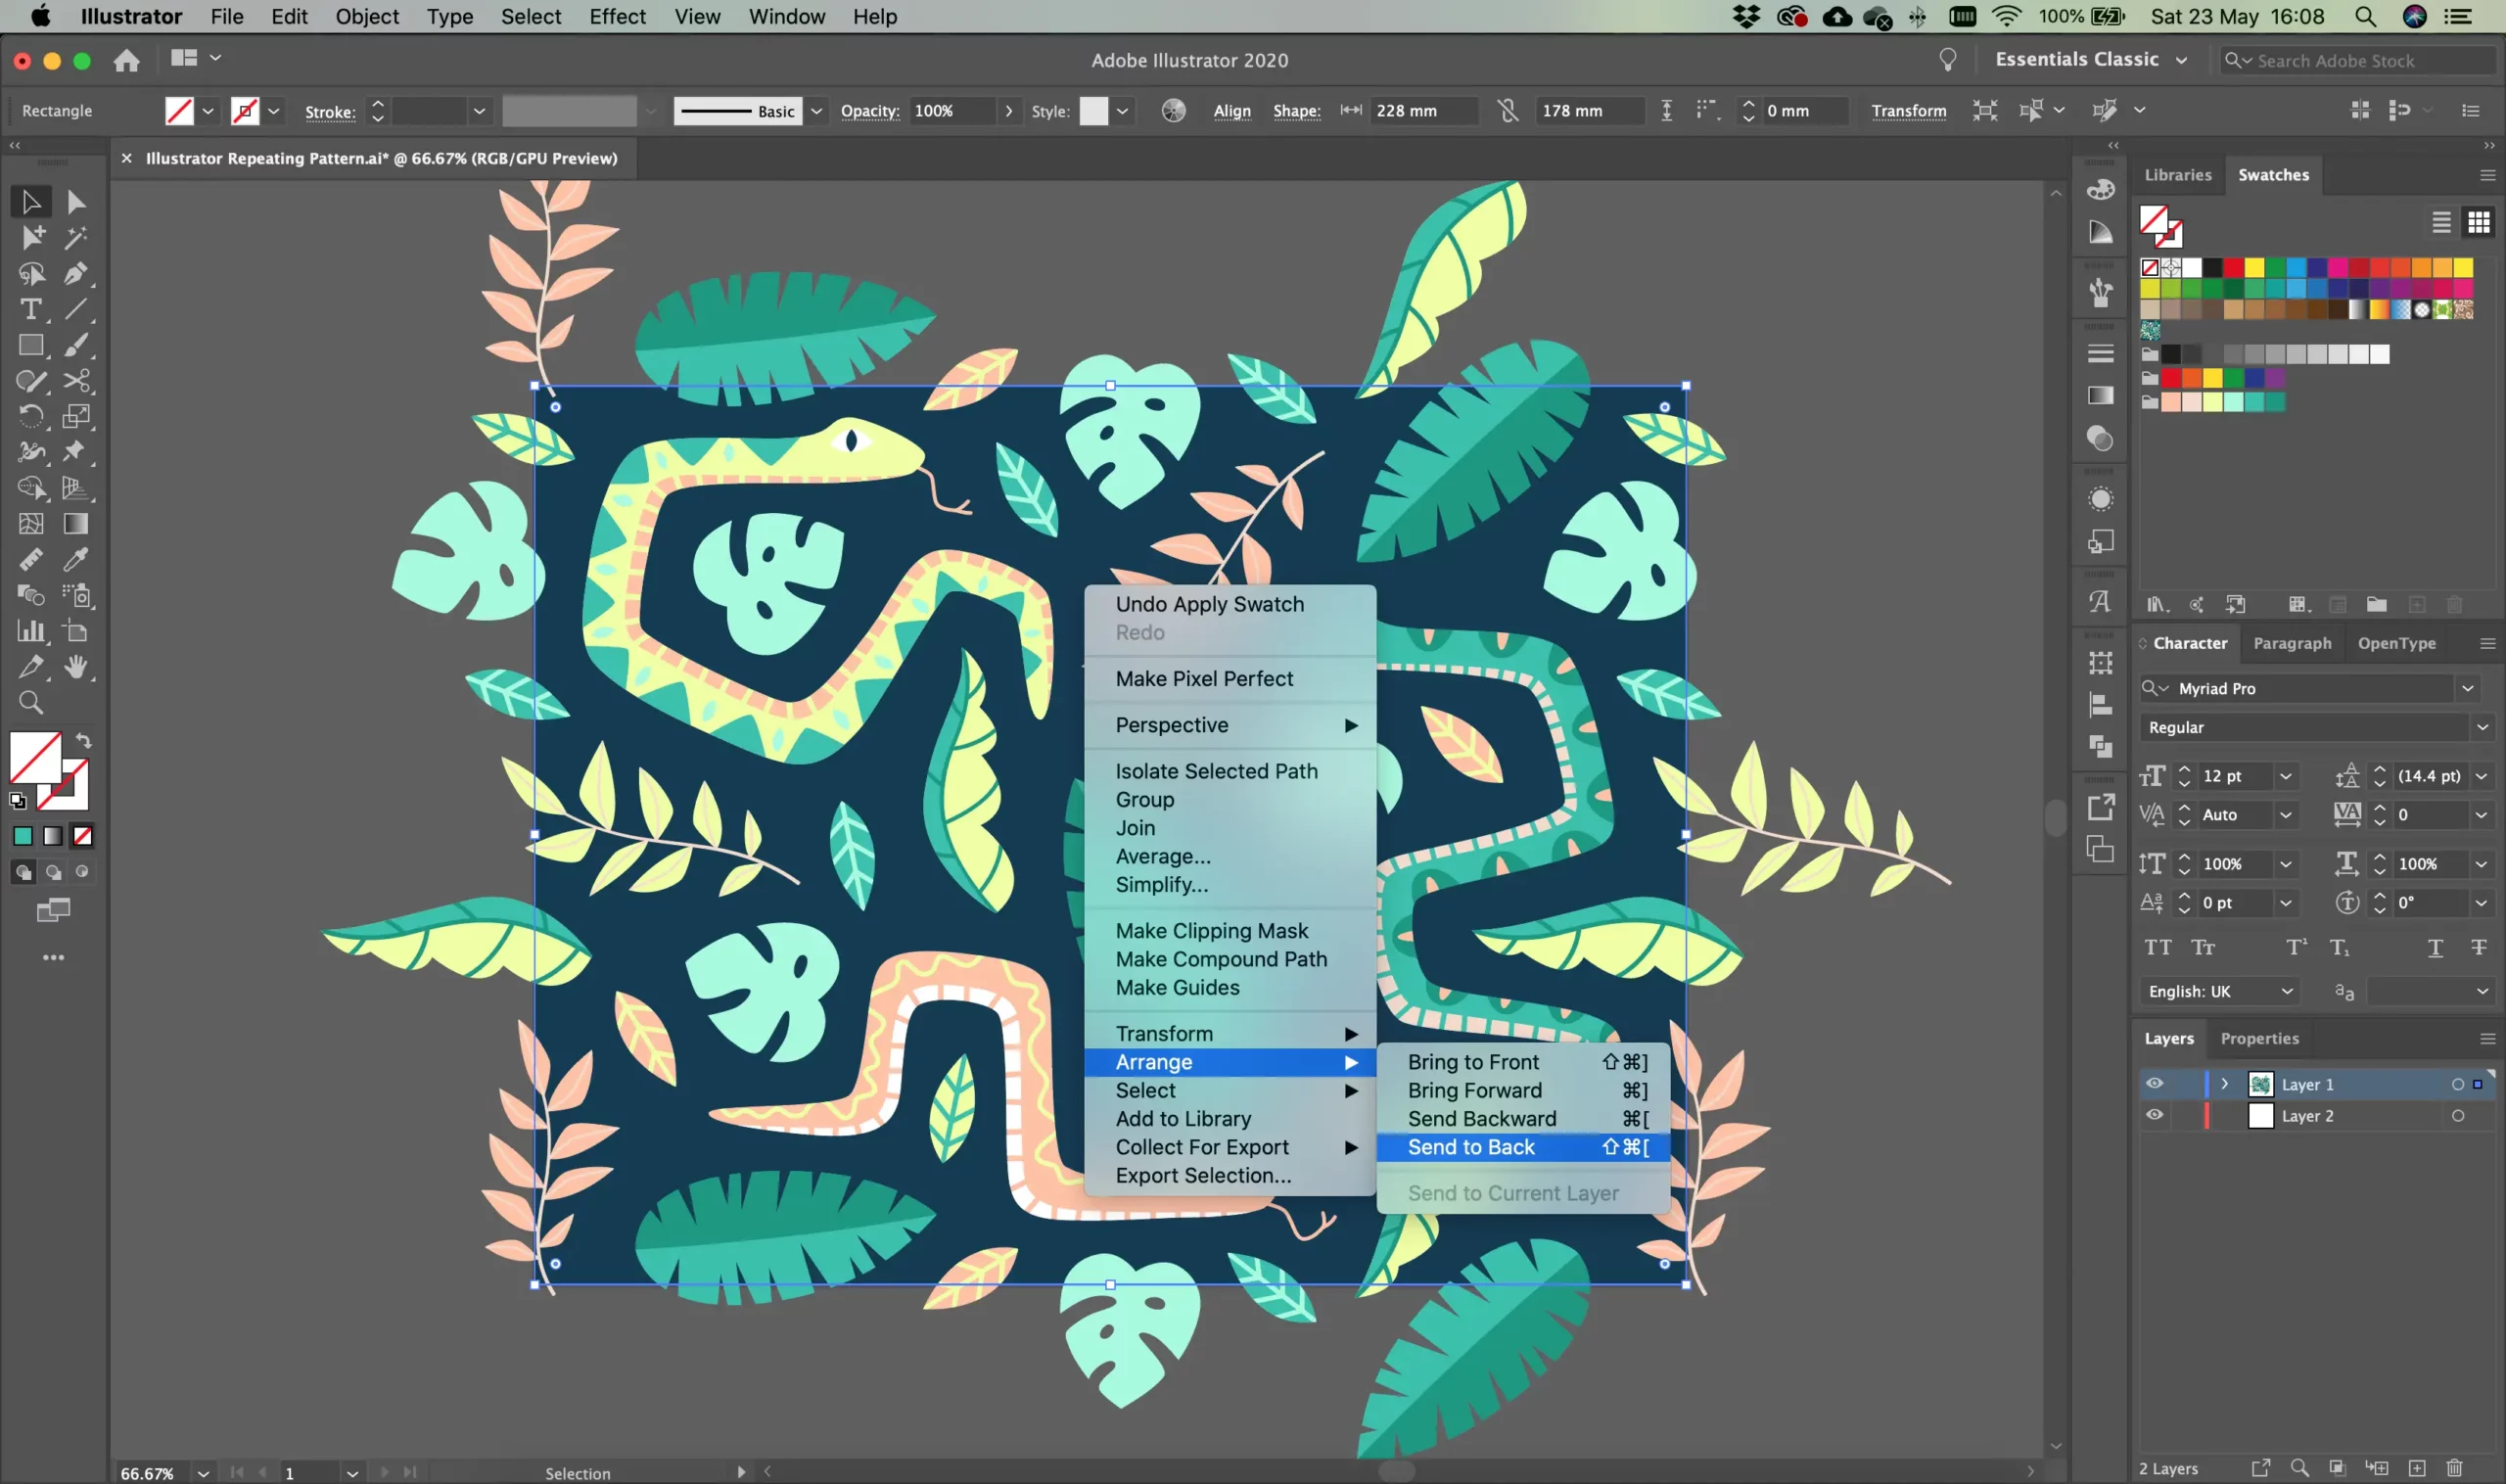
      If you need to make adjustments, simply delete the copies, double click on your original masked tile, and you can move things around. If you find it easier, go back a few steps. Once you’re happy, you can move forward to exporting your pattern.

    Creating a swatch

    If you prefer to keep your pattern in Illustrator and want the software to do the hard work for you when using the pattern, then you can create a swatch of your tile to be used on other objects, like a fill colour.

    PROS:

    • Works well with Adobe Illustrator.
    • Keeps your artwork in a scalable vector format.
    • An ‘automatic’ way to test your repeat.

    CONS:

    • Very little flexibility to your pattern once created.
    • Not much control over the use of the pattern.
    • Swatches must be saved in order to use in other files.
    • Pattern swatch

      Make sure that your background colour (if you have one) and your artboard perfectly align.

      Draw a rectangle precisely to your artboard (or you can Copy and Paste your background rectangle).

    • Pattern swatch

      Make this rectangle invisible by removing all fill and outlines.

      With the invisible rectangle selected, right click > Arrange > Send to Back.

      The pattern tile will take the dimensions of whatever size this rectangle is.

    • Pattern swatch

      Select All (make sure there’s nothing else in the file offscreen).

    • Pattern swatch

      Create your pattern swatch by going to Object > Pattern > Make. You will be presented with the following dialogue box. Ensure that dimensions match that of your artboard and that the preview you’re seeing looks correct, with everything aligning properly. Play around with the settings if you’d like to get familiar. Click Done along the top edge of your viewing window when finished.

    • Pattern swatch

      Your pattern will appear in the Swatches panel and you can use it to fill objects!

    Exporting your pattern tile

    If you want to use your pattern anywhere other than Illustrator, you’re going to need to export it as an image file.

    To do this, ensure that your artboard is correctly aligned to the edge of your tile. When exporting, I find it useful to extend the background colour beyond the artboard in all directions just to eradicate any chance of it not being perfectly fitted to the artboard. It’s also best to release your clipping mask if you have one set.

    Go to File > Export > Export As. Name your file, and ensure that you have ticked ‘Use Artboards’ before clicking export.

    And you’re done!

    You now have a pattern tile that will seamlessly repeat that you can use for many different outlets.

    Enjoy seeing what new patterns you can create! Tag me in patterns you make using this repeating pattern tutorial – I’d love to see!

    Related topics.

    How to set up postage for your online shop.

    When you first get started, setting up your online store postage can be really daunting. Over the years I’ve had to reassess and change this system several times, including when moving to a new website or marketplace. It’s easy to feel overwhelmed by all the options available to you, and...

    Read Article

    Clare’s top 5 tips for making stickers.

    Stickers are a great product that can get your illustrations out there. They’re low-cost, fun and versatile, meaning that they’re great both to sell and to purchase. Below I’m going to go through my five top things to consider when creating your designs.

    Read Article

    Let's chat!

    If you’d like to reach out to me to talk about a project, collaboration, have some Qs or want to say hi, drop me a message - I’d be happy to help!

    Get in Touch

    Let’s keep this good thing going.

    Be the first to know about new articles, products, and projects too.

    This field is for validation purposes and should be left unchanged.